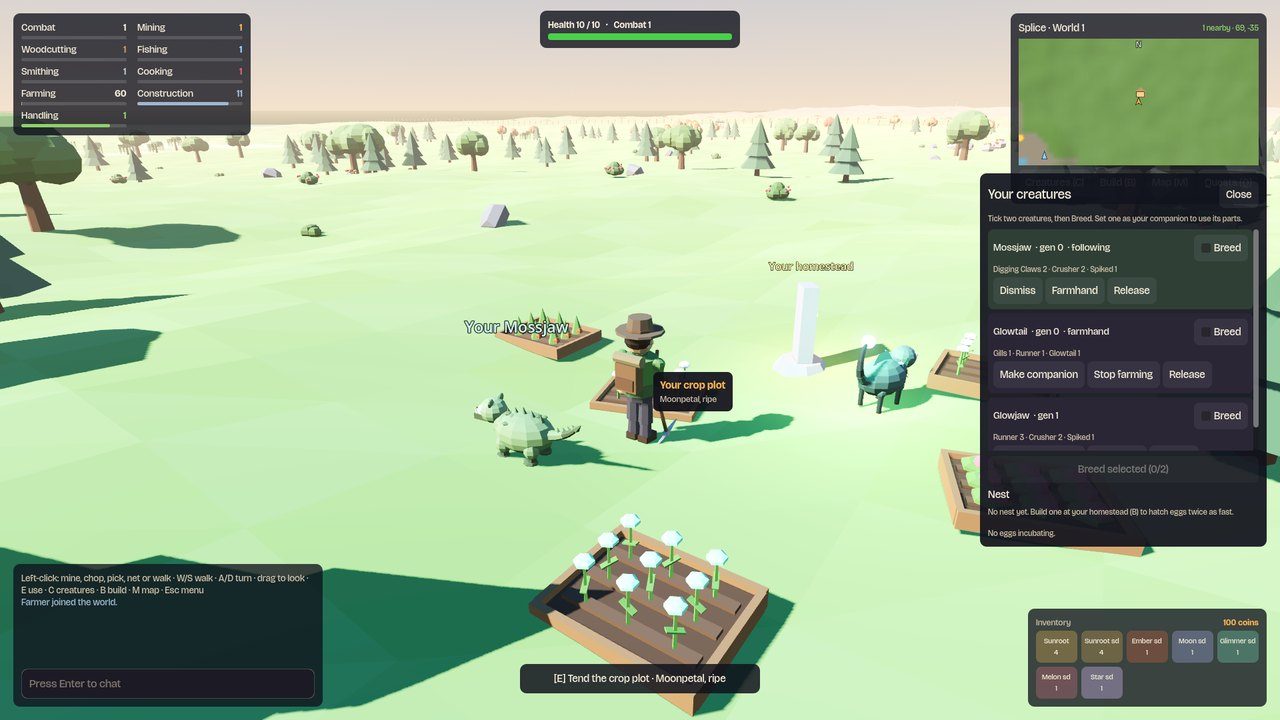
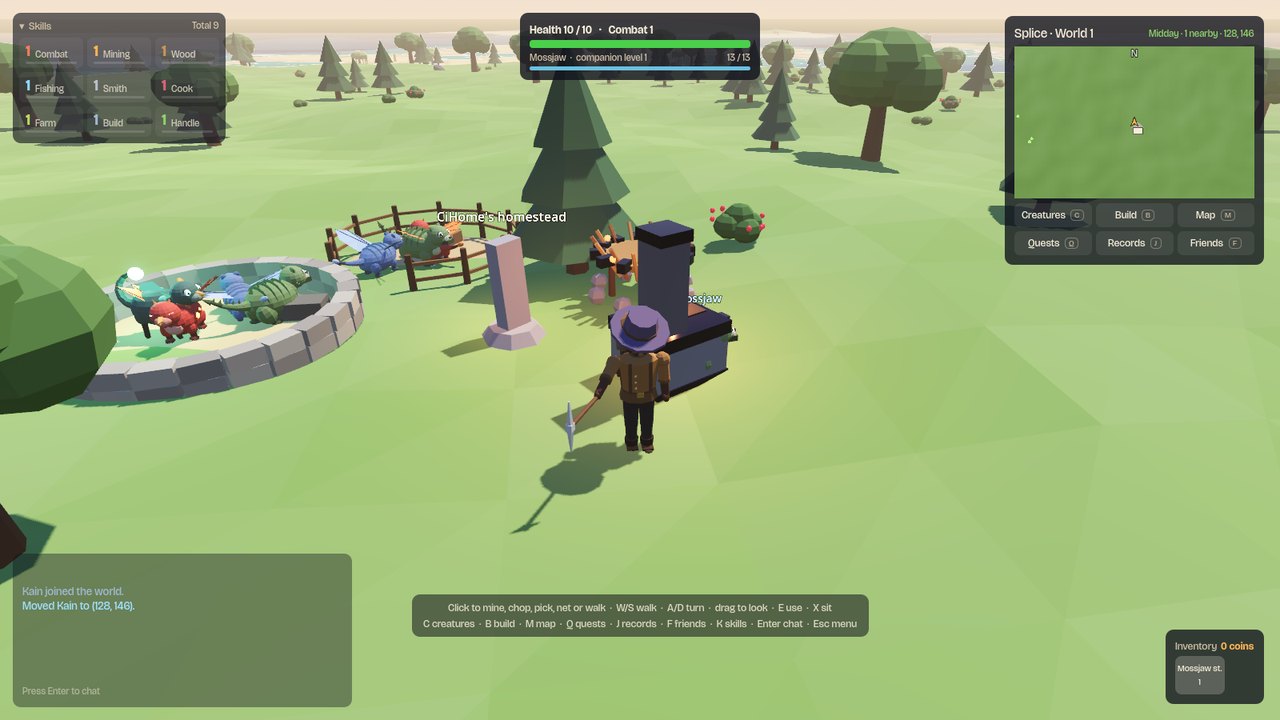
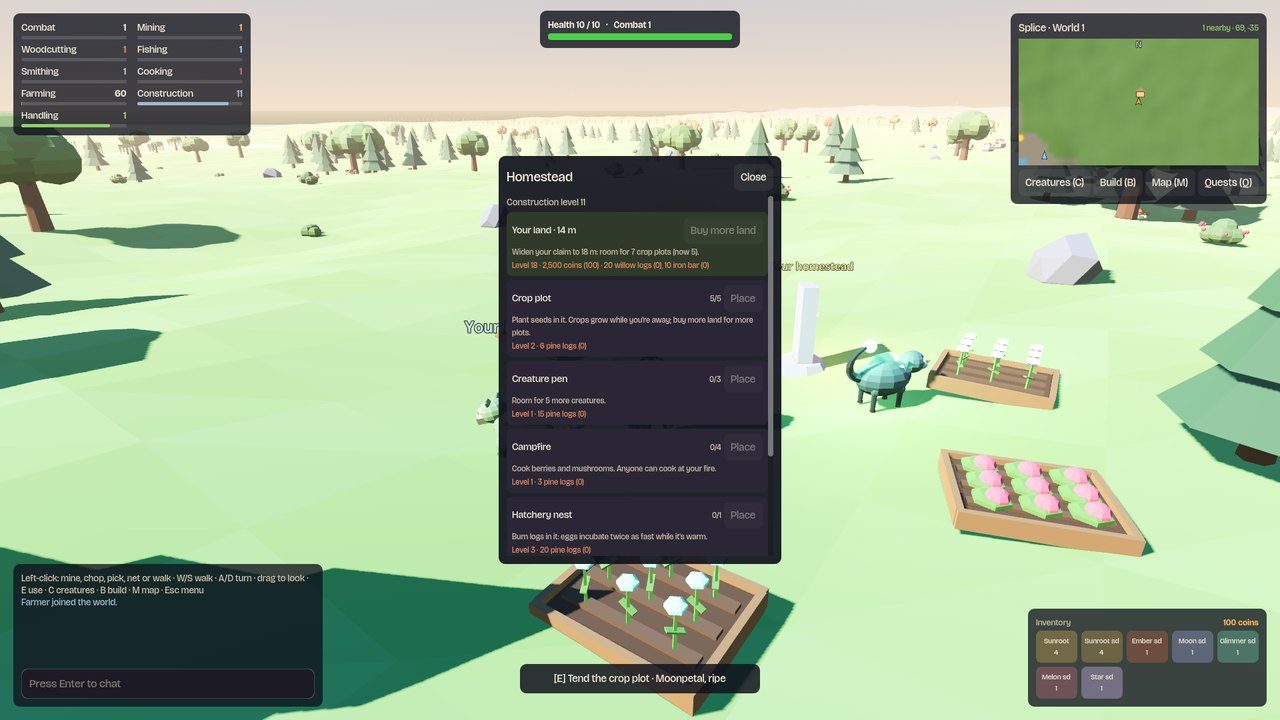
Splice is an online game set on a shared island. You catch wild creatures, breed them into new bloodlines, and train skills side by side with everyone else on your world.
Everything you do happens on a server that all players share. The rocks you mine empty for everyone, the trees you fell regrow for everyone, and the prices on the Trade Board are set by other players. Your crops keep growing and your eggs keep incubating while you're offline.
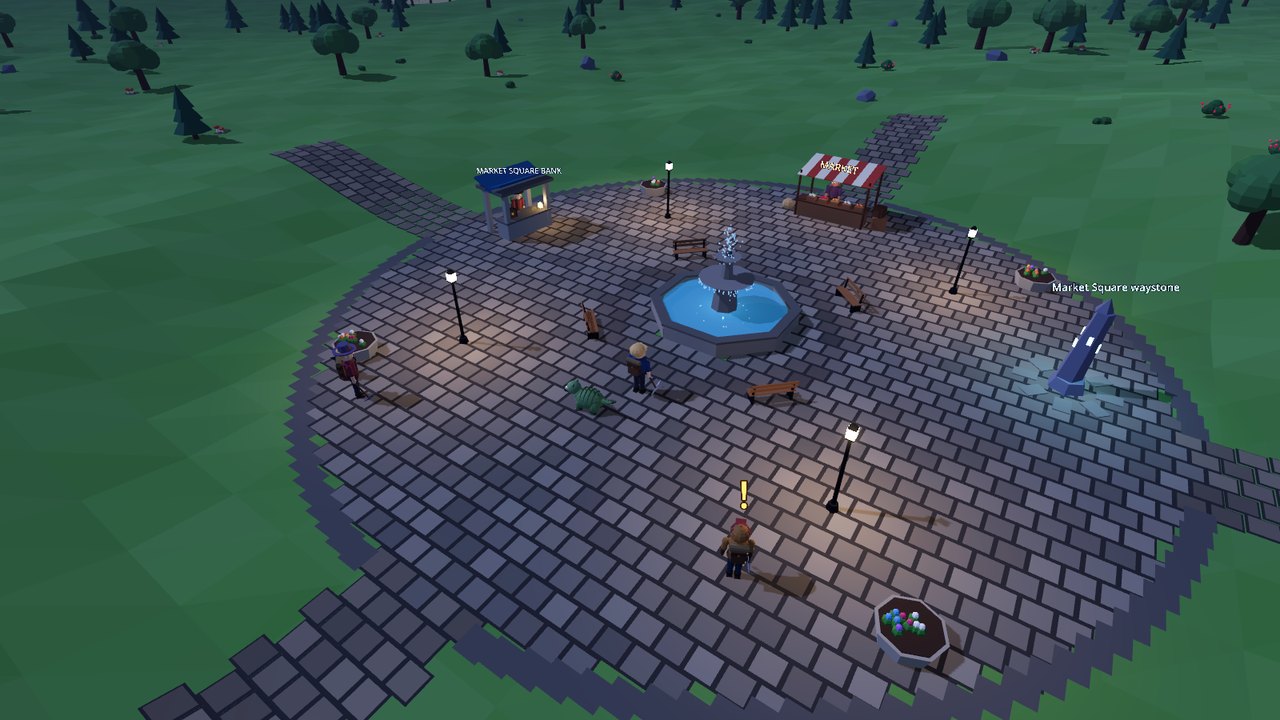
Market Square, where every player starts: the fountain in the middle, the market stall to the north, the bank to the west, a waystone to the east and the first quest givers to the south.
The shape of the game
Creatures are your tools
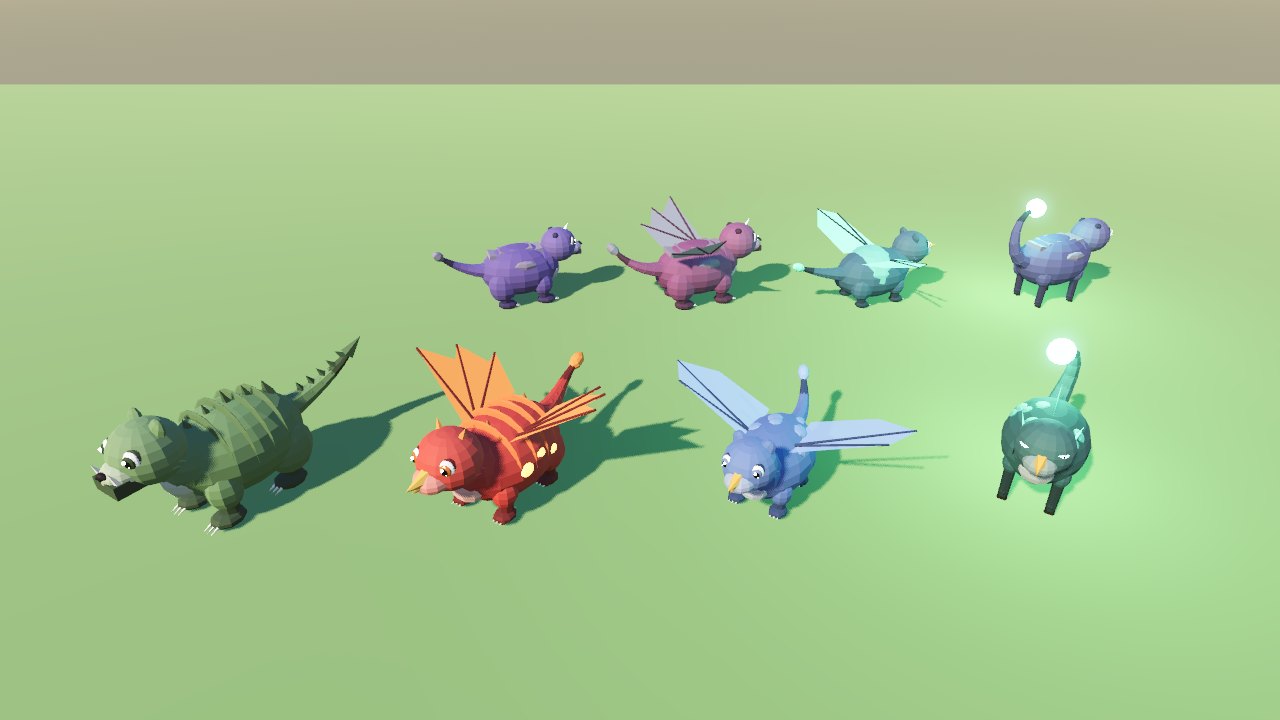
Every creature is built from five parts: body, legs, jaw, wings and tail. Your companion lends you its parts. Digging claws mine faster, a gem-cutter jaw lets you mine crystal, gills let you catch glassfish. Breeding is how you get the parts you want at the levels you want.
Skills grow with use
Nine skills go from level 1 to 99, RuneScape style. You train a skill by doing it: mining trains Mining, cooking trains Cooking. Higher levels unlock better ores, trees, fish, crops, recipes and gear.
Your own patch of land
Place a Homestone to claim a homestead. Build pens, a hatchery nest, a forge, campfires and crop plots, then buy more land as you grow. Everyone can see your homestead.
Risk and reward up north
The Wildlands cover the northern half of the island. The best ore, trees and fish are there, and so are feral creatures and other players who can attack you.
A good first goal
Follow Warden Hale's four quests (see Quests). They walk you through mining, woodcutting, claiming land, cooking, catching, breeding and travelling, and pay coins, XP and supplies along the way. By the end of them you'll have seen most of the game.
Directions and distances
North is the top of your map. The Wildlands lie to the north; the south, east and west are the safe lands. Distances are in metres. You walk about 6 metres a second, so crossing the whole island end to end takes about four minutes.
2Start here
Getting started
Create an account, pick a world and step into Market Square.
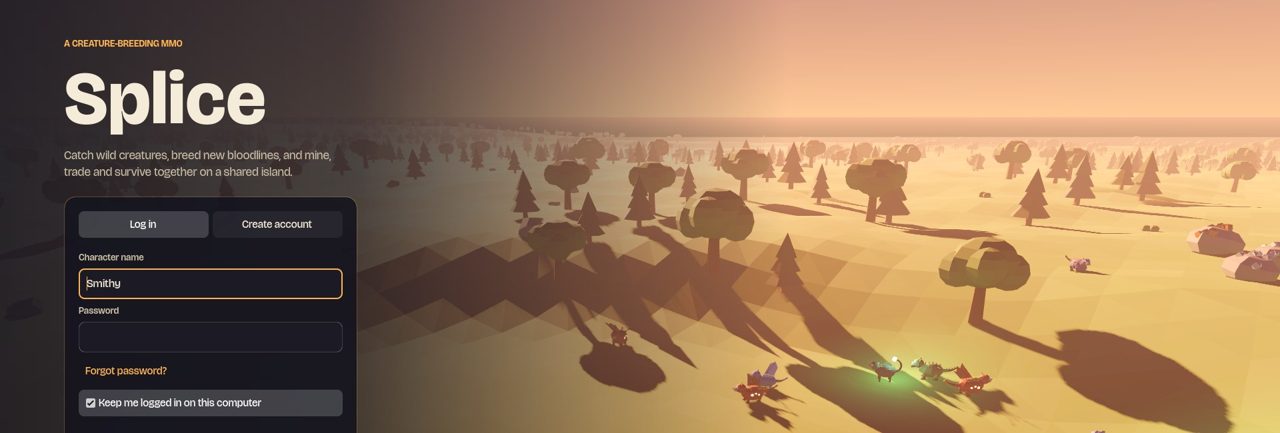
The login screen: Log in and Create account tabs, with a live flyover of the island behind. The world list sits below the password box.
Create your account
Download Splice, unzip it and double-click Splice.exe. There's nothing to install. If Windows says "Windows protected your PC", choose More info, then Run anyway.
Choose the Create account tab.
Type a character name. This is the name everyone sees over your head and the name you log in with.
Choose a password of at least 8 characters. Don't use one you use anywhere else.
Add an email address. It's optional but recommended: it's the only way back in if you forget your password. The game emails you a 6-character code to confirm it; enter it under Esc → Account and email.
Pick a world from the list and press Join, or double-click the world.
The world list
Under World on the login card is a row for each official world. The game checks each one every 15 seconds and shows:
What you see
What it means
World 1 · 12/64 online · 38 ms
The world is up: players on, the player limit and your ping (lower is smoother).
Offline
The world can't be reached right now. It may be restarting for an update. Try again in a minute.
Newer version: update to join
The world is on a newer version of Splice. Press Update on that row (see below).
Different game version
Your game and the world don't match and there's no update for you yet: the world may be mid-update. Try again shortly.
Click a world to choose it, then press Join, Log in or double-click it. Other server… lets you type any other address if a friend is running their own server.
Updating the game
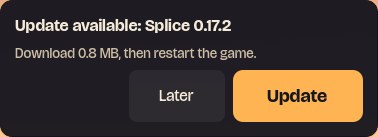
Splice updates itself. When there's a new version, this card appears at the top right of the login screen:
Press Update (usually a download of about a megabyte), then Restart now.
Your account and everything in it live on the server, so updating never touches your progress. Very occasionally an update needs a fresh download instead: the card then says Download and opens the download page.
Keep me logged in
Tick this on your own computer and the game logs you straight in for 30 days. Don't tick it on a shared computer. Logging out from the Esc menu makes the computer forget you.
"The server's key has changed"
The first time you join a world, the game remembers its security fingerprint. If that ever changes, you'll get a warning before your password is sent. That can happen after a server move, but it's also what you'd see if someone were pretending to be the server. If you haven't heard of a server move on the official channels, don't log in: ask first.
Your first ten minutes
You arrive just south of the fountain in Market Square with an empty pack and one creature: a Mossjaw, who follows you as your companion. Mossjaws have digging claws (faster mining), a crusher jaw (faster woodcutting) and a spiked tail (harder hits), so yours is useful from the start.
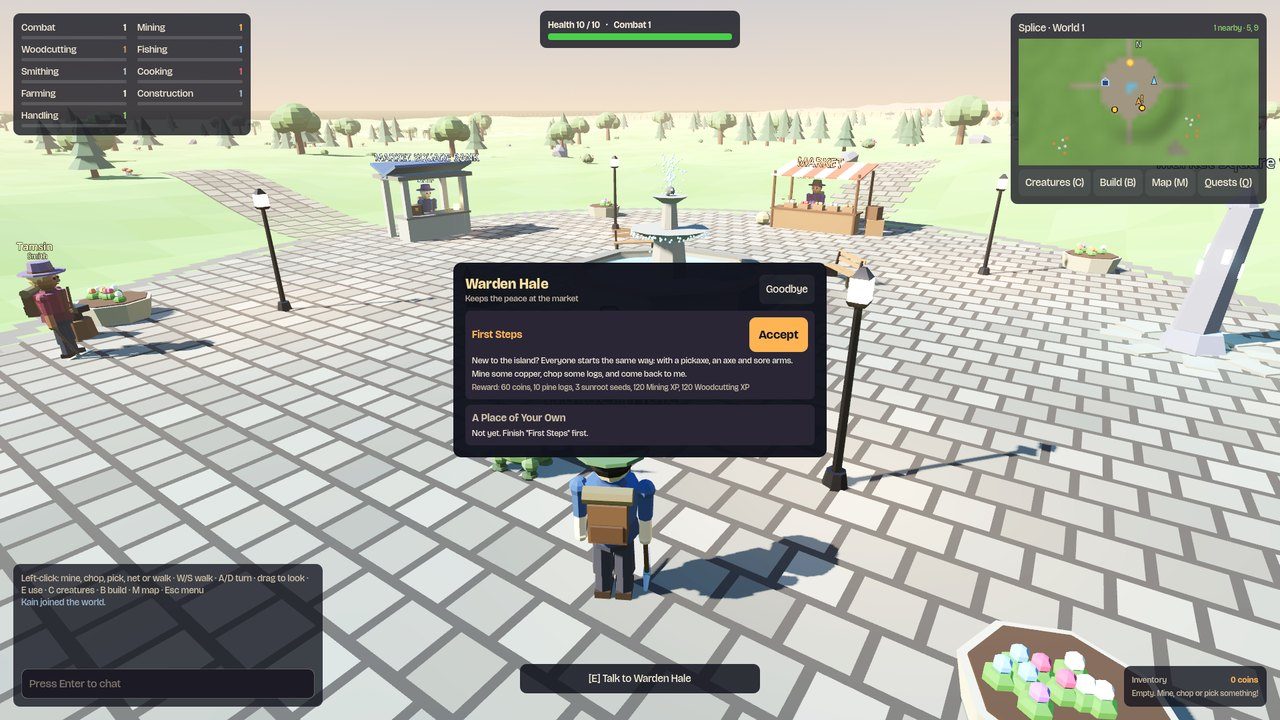
Talk to Warden Hale, just south of the fountain (he has a gold ! over his head). Click him or press E next to him, and accept First Steps.
Mine 3 copper. There are copper and tin rocks a short walk east and west of the square. Click a rock to walk over and mine it.
Chop 3 logs from any tree. Pine (level 1) grows everywhere.
Go back to Hale. He pays 60 coins, XP, 10 pine logs and 3 sunroot seeds, and hands you the next quest: claiming your own land.
You don't need to buy tools to start
You always have a basic pickaxe and axe. Better ones (see Smithing) are faster, and you use the best one you carry automatically. There's nothing to equip.
3Start here
Controls and the screen
Splice is played mostly with the mouse: click something and your character walks over and does it. The keyboard opens panels and lets you steer directly.
Mouse
Input
What it does
Left click the ground
Walk there, finding a way round rocks, trees, buildings and water in the way
Left click a rock or tree
Walk to it and mine or chop until it's empty or falls
Ride your companion; press it again to get down (see Your companion)
R / right click
While placing a building: rotate / cancel
K
Fold the skills panel away (or click its header)
X
Sit on the nearest bench or hammock (or on the ground); press it again, or walk, to stand
Enter
Chat (Esc cancels)
Esc
Menu: settings, account and email, change password, log out, quit
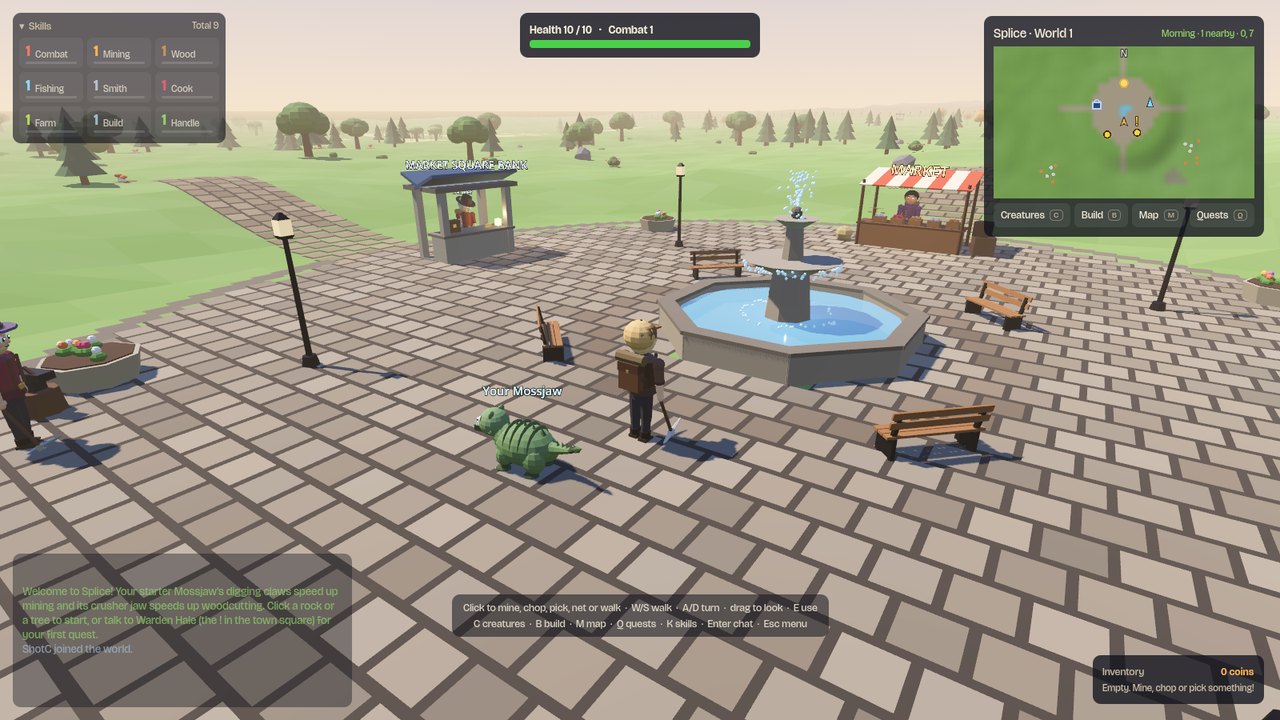
In game: your skills top left, health at the top, the minimap top right with the time of day and your three current quests under it, chat bottom left.
What's on your screen
Health is at the top of the screen. It only matters in the Wildlands (and raids). Your companion is under it, and your party too if you're in one.
Skills show your level in each, with a thin bar for progress to the next. A tile lights up when that skill earns XP. Hover one for your XP and how much you need for the next level, and press K to fold the panel away.
The minimap (top right) shows what's around you, and above it the time of day. Press M for the full island map. The buttons under it open your creatures, the build menu, the map, the quest log, your records and your friends (their keys are shown on them).
Quests you're on show under the minimap, with the next step for each, and under them how many of today's bounties you've done and how far along the next one is.
Chat (bottom left) shows what players on your world say, plus game messages: what you caught, what you made, level-ups. It stays faint until you hover it or press Enter to type; then the All, Chat and Game tabs let you show only player chat or only game messages.
Your inventory lists everything you carry, grouped by kind, with your coins at the top.
Day and night: a full day on the island takes 40 minutes, the same for everyone. About a third of it is night: the stars come out, the lamps in Market Square light up, and fireflies drift over the countryside.
Weather
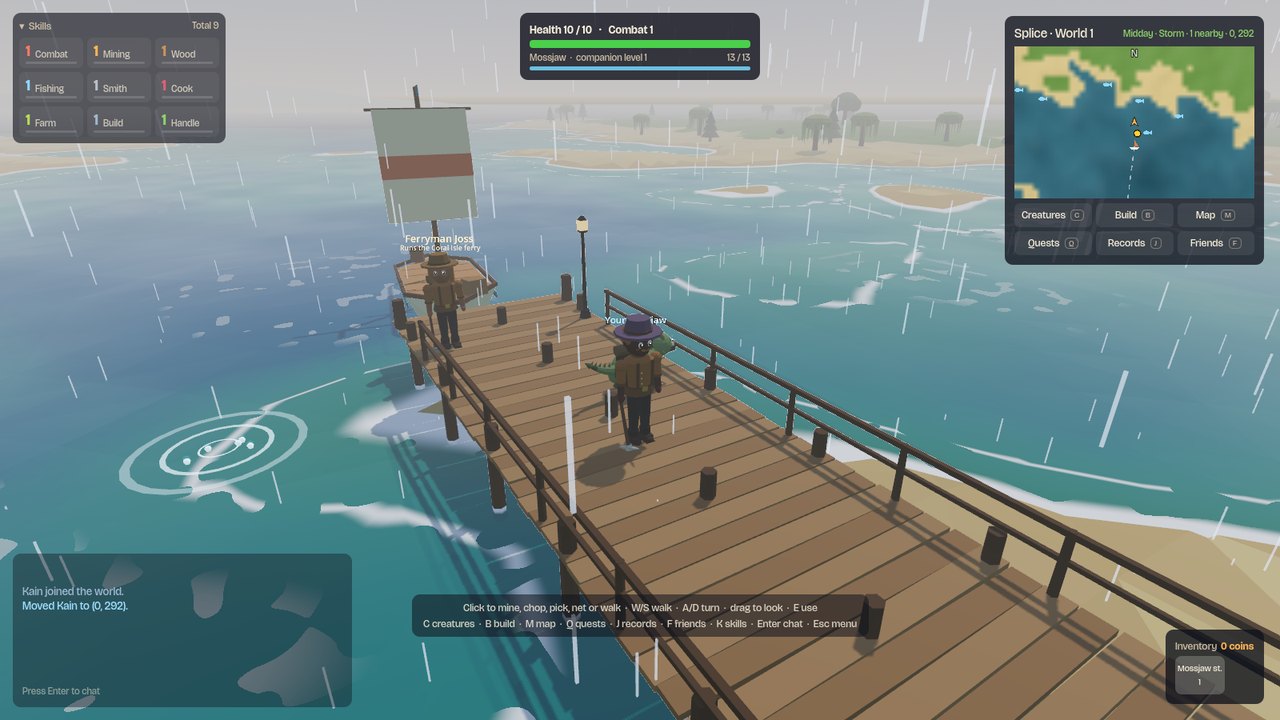
The weather changes every 10 minutes or so, the same for everyone. It's fine about two thirds of the time; otherwise a tropical shower blows through, and now and then a thunderstorm: heavy rain, low cloud, lightning and thunder, and the ferry rolls in the swell. Rain doesn't stop anything, and fish bite more readily in it: in a storm each cast's chance of catching something goes up by 12 points (from 50% to 62%, say). The minimap header says Showers or Storm while it lasts.
A storm over Southreach Pier.
Sitting and emotes
Press X by a bench (in Market Square, on the piers or on your homestead) or a hammock to sit on it; away from a seat you sit on the ground. Press X again, or walk, to stand up. In chat, /wave, /cheer and /dance do what they say (a dance lasts until you move), and /sit and /stand work too. Everyone near you sees it.
You see other players, creatures and events within about 90 metres of you. Settings (Esc) has fullscreen, mouse sensitivity, name tags and separate volume sliders for music and sound effects.
4Skills
Skills and XP
There are nine skills, each from level 1 to 99. You train a skill by doing it, and each level needs roughly 10% more experience (XP) than the last.
Skill
Trained by
Levels unlock
Mining
Mining ore at rocks
Better ores; faster with better pickaxes
Woodcutting
Chopping trees
Better trees; faster with better axes
Fishing
Fishing at spots along the coast
Better fish; more bites per cast
Smithing
Smelting bars and smithing at your forge
Better bars, tools, swords and armour
Cooking
Cooking at any campfire
Better food; less burning
Farming
Planting, watering and harvesting crops
Better crops
Construction
Building on your land
More buildings and bigger land
Handling
Catching creatures and hatching eggs
Better catch chances
Combat
Fighting ferals and players in the Wildlands
More health, accuracy, defence and max hit; better gear
How much XP a level needs
The curve is gentle at first and steep at the top: level 50 takes about 101,000 XP, and level 99 about 13 million. Total XP needed to reach each level:
Level
Total XP
Level
Total XP
2
83
5
388
10
1,154
15
2,411
20
4,470
25
7,842
30
13,363
40
37,224
50
101,333
60
273,742
70
737,627
80
1,986,068
90
5,346,332
99
13,034,431
XP calculator
XP needed—
Actions—
Uses the game's own level curve. Starts from the beginning of your current level.
A banner and a jingle tell you when you level up.
XP from quests
Quests pay XP in the skills they teach, often a level or two's worth early on. Warden Hale's first quest alone takes Mining and Woodcutting from 1 to about level 2.
5Skills
Gathering
Mining, woodcutting, fishing and foraging bring in the raw materials for everything else. Click a resource and your character keeps working it until it's used up.
Mining
Click a rock to walk to it and mine. Each ore gives Mining XP. When a rock is empty it greys out and refills after a while, for everyone on the world, so a busy spot runs dry. Ore rocks show on the island map.
Ore
Level
XP
Refills
Where
Companion needs
Copper
1
18
5 s
Around Market Square and across the safe lands
Tin
1
18
5 s
Same rocks as copper
Iron
15
35
10 s
Further out: east, west, south and the northern hills
Every tree on the island can be chopped. You keep chopping, one log at a time, until the tree falls; better trees give several logs before they do. Felled trees become stumps and regrow for everyone.
Tree
Level
XP per log
Falls
Where
Companion needs
Pine
1
25
Always after one log
Everywhere
Oak
15
38
35% per log
Woods across the island
Willow
30
68
25% per log
By the water
Maple
45
100
20% per log
Northern hills
Ironbark
60
175
15% per log
The Wildlands
Crusher jaw
Palm
20
48
30% per log
Coral Isle
Emberwood
55
130
20% per log
Ember Isle's slopes
Tools
Pickaxes and axes are smithed at your forge (see Smithing). You use the best one you carry and have the level for; it shows in your character's hands. They never wear out. Without one you still have your old starter tool.
Tier
Level to use
Speed
Made from
Smithing (pick / axe)
Bronze
1
+15%
2 bronze bars
1 / 2
Iron
10
+30%
2 iron bars
15 / 16
Steel
25
+50%
3 steel bars
30 / 31
Crystal
50
+80%
2 steel bars + 3 crystal
55 / 56
Obsidian
65
+110%
2 steel bars + 4 obsidian
68 / 69
Fishing
Look for rippling water near the shore. Click a spot to walk to the water's edge and cast; you keep fishing until you walk away or the fish move on. Spots drift to a new place on the same stretch of coast every few minutes. Each cast has a 35% chance of a bite at the fish's level, rising 2% per level above it, up to 85%.
Fish
Where
Level
XP
Companion needs
Sandfish
Shallows (south and west coasts)
1
12
Silverfin
Shallows, the reef and Coral Isle's lagoon
12
28
Reef snapper
Reef (east coast)
25
50
Stormeel
Deep water (under the northern cliffs)
42
85
Glassfish
Deep water
58
140
Gills
Parrotfish
Lagoon (all round Coral Isle)
35
64
Firefin
Hot vents (all round Ember Isle)
50
110
Nell's rod is the only fishing tool: Fisher Nell mends her late husband's rod for you at the end of her quests (see Quests). Carry it and, from Fishing 40, every cast finishes 25% faster. Nobody can smith one.
Foraging
Berry bushes and mushroom patches grow all over the safe lands. Anyone can pick them, with no level needed, and they regrow for everyone: bushes after 40 seconds, mushrooms after a minute. Picking sometimes turns up seeds:
Picked from
Seed
Chance
Berry bush
Sunroot
18%
Berry bush
Emberbean
6%
Mushroom patch
Moonpetal
8%
Mushroom patch
Heartmelon
3%
What speeds gathering up
Companion parts: Digging Claws +10% mining speed per level; Crusher jaw +10% woodcutting per level; Gills +10% fishing per level.
These multiply together, so a level 3 Digging Claws companion (+30%), a steel pickaxe (+50%) and forager's stew (+15%) make you mine about twice as fast.
Gathering speed calculator
Speed—
Time per item—
Digging Claws for mining, Crusher jaw for woodcutting, Gills for fishing. Tools apply to mining and woodcutting.
6Creatures
Creatures
Creatures are at the heart of Splice. Each one is built from five parts, and every part can do something for you.
Wild creatures wander their home areas and come back after being caught.
Parts and trait levels
Every creature has a part in each of five slots: body, legs, jaw, wings and tail. Each part has a trait level from 1 to 5, and most abilities get stronger with each level. Plain parts (plain body and tail, stubby legs, beak, no wings) do nothing; these are the useful ones:
Part
Slot
What it does for you
Fire Gland
Body
Heats your forge: smith without burning logs
Stone Hide
Body
+6 defence per level in fights
Gills
Body
+10% fishing speed per level; needed for glassfish. As farmhand: waters your crops
Digging Claws
Legs
+10% mining speed per level. As farmhand: bigger harvests
Runner
Legs
+4% move speed per level
Gem Cutter
Jaw
Lets you mine crystal
Crusher
Jaw
+10% woodcutting speed per level; needed for ironbark
Glider
Wings
+5% move speed per level
Skyfin
Wings
Scouting: shows ferals and players on your map from 130 m (+30 m per level)
Glowtail
Tail
Lights the way. As farmhand: crops grow 10% faster per level
Spiked
Tail
+1 max hit per level in fights
Echo
Tail
Finds hidden ore veins near you, more often per level (only by mutation)
Cinder Tail
Tail
Cooks evenly: 20% less chance to burn food per level (never at level 5)
A creature's summary line (for example Digging Claws 2 · Crusher 1 · Spiked 1) lists its useful parts and their levels.
The slopes of Ember Isle (take the ferry from Eastmere)
Wild creatures come with trait levels of 1 to 3. Rarer species are harder to catch and their eggs take longer to hatch.
Catching
Click a wild creature to walk within 7 metres and throw your net. If it works, the creature is yours. If not, it runs off and you can try again once you catch up. Your chance depends on your Handling level and the creature's rarity:
Handling
Common
Uncommon
Rare
1
37%
25%
13%
10
55%
43%
31%
20
75%
63%
51%
30
90%
83%
71%
40
90%
90%
90%
Each catch gives Handling XP: 25 for a common, 50 for an uncommon, 75 for a rare. Even a miss gives 5.
Room for creatures
You can keep 20 creatures (eggs count too), plus 5 more for each creature pen on your land, up to 35. When you're full, release one from the Creatures panel (C). You can't release your last creature.
Your companion
Your companion is the creature that follows you around. Its parts are the ones that count for mining, woodcutting, fishing, moving and fighting, so swap companions to suit the job: a Quartzmole-blooded digger for mining crystal, a Glowtail for fishing and speed, a Mossjaw for chopping and fighting. Choose it in the Creatures panel (C).
Skyfin wings and Echo tails
A companion with Skyfin wings scouts ahead: ferals and other players show on your map far beyond the 90 m you can see (130 m at level 1, up to 250 m at level 5). Red marks are ferals, white players, orange raiders; ones beyond the minimap's edge sit on its rim, pointing the way. In the Wildlands it also warns you in chat when another player comes into range, and which way they are.
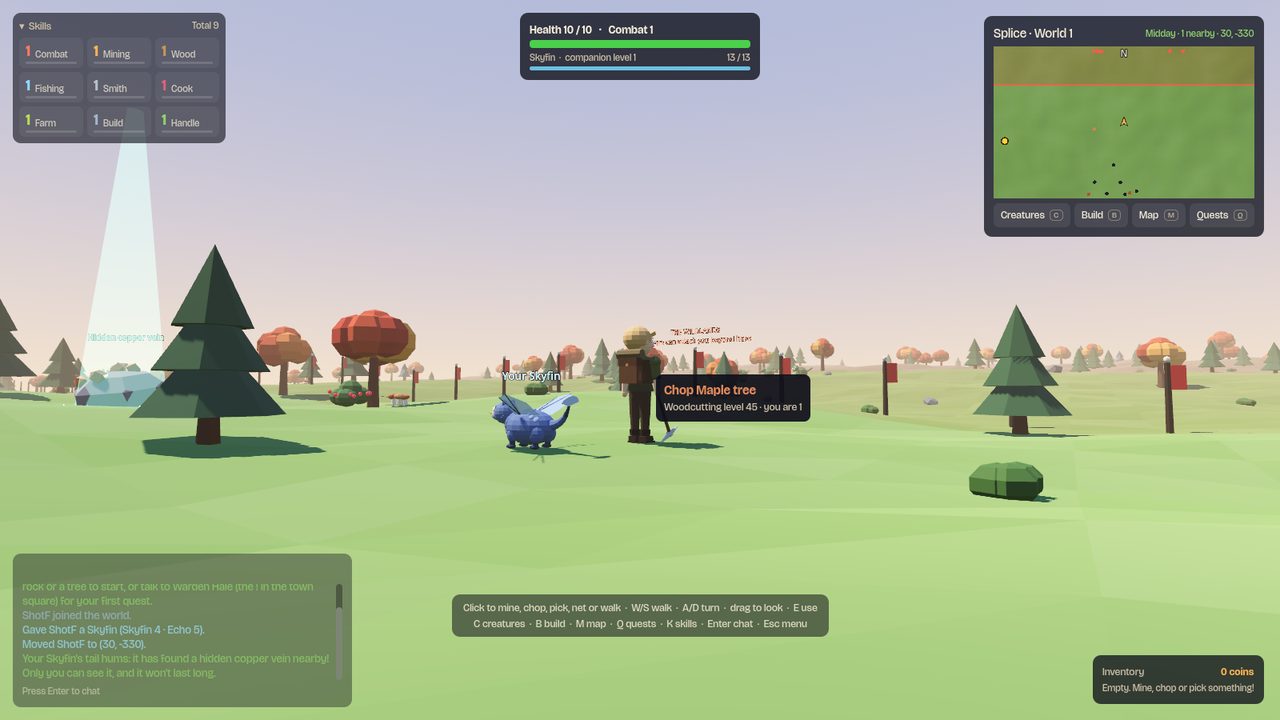
A companion with an Echo tail finds a hidden ore vein near you every few minutes (every 3½ minutes at level 1, every 1½ at level 5). Only you can see it (it shimmers teal) and only you can mine it; it holds 4 to 8 ore and is gone after 2 minutes. It's an ore you can mine that belongs where you are: copper, tin, iron or coal in the south, crystal from depth 8 (with a Gem Cutter), starmetal from depth 30. No wild species has an Echo tail: it turns up by mutation when breeding.
A hidden vein your Echo found, and ferals your Skyfin spotted, on the rim of the minimap.
Fighting together
Your companion fights ferals beside you (never other players). It joins in on any feral you attack, and defends you from one that attacks you. Its parts decide how it fights:
Crusher and Gem Cutter jaws: more accurate bites (+4 and +3 accuracy per level).
Stone Hide: +6 defence and +4 health per level.
Spiked tail: +1 max hit per level.
Fire Gland: now and then breathes fire, an extra burst of damage that can't miss.
Runner legs and Glider wings: 5% quicker attacks per level, up to 30% quicker.
Companion levels. A companion grows from companion level 1 to 30 by fighting: every hit it lands and every feral it helps defeat earns it companion XP, and you earn Handling XP from its hits. Each level adds accuracy, defence and health, and every five levels a little more damage. The level belongs to that creature, even back in its pen, but isn't passed on to its young: every hatchling starts at level 1.
Knocked out? Ferals sometimes turn on a companion that's biting them. If its health runs out it limps home to rest for 90 seconds, then comes back at full health. It's never lost. Its health and level show under your own health bar, and it heals slowly out of a fight.
Stay back. To keep it out of fights, press Stay back on it in the Creatures panel (its parts still help you). Fight with me sends it back in.
Riding
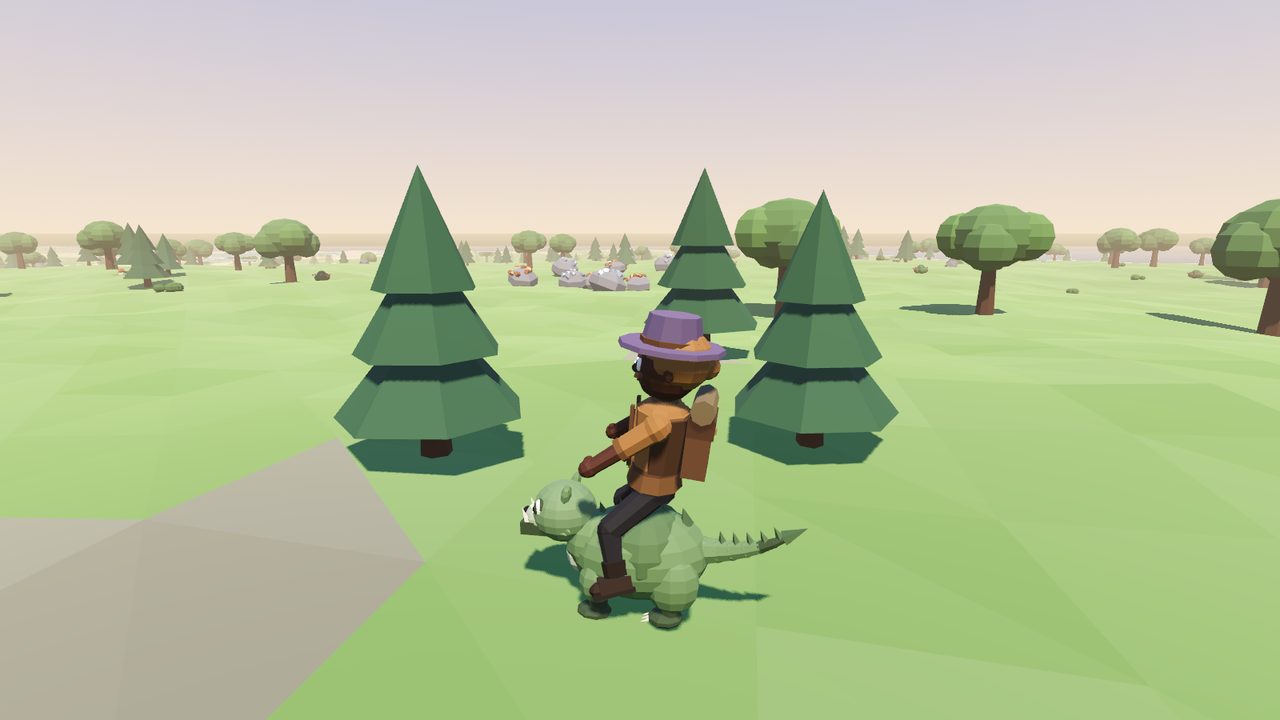
Press R (or Ride on your companion in the Creatures panel, or type /ride) to climb onto its back. Any companion carries you 40% faster than walking; each level of Runner legs adds 8% more and each level of Glider wings 6%. Everyone sees you riding.
You climb down by yourself when you mine, chop, fish or pick something, start a fight, board a ferry, get hit, or your companion is knocked out. Press R again (or /dismount) to get down any time. You can't climb on in the middle of a fight, or while your companion is resting.
Riding a Mossjaw: 40% quicker than walking, more with Runner legs.The Creatures panel: choose a companion or farmhand, breed pairs, check on eggs and feed them treats.
7Creatures
Breeding
Breed two of your creatures and you get an egg. The baby inherits parts from both parents, sometimes stronger, and now and then with a mutation nobody has seen before.
How to breed
Open the Creatures panel (C).
Choose two of your creatures and press Breed. Any two of your creatures can breed, of any species.
You get an egg. It incubates in real time, even while you're offline.
When it's ready it hatches on its own and joins your creatures. Each hatch gives 40 Handling XP.
You can have up to 3 eggs at once, and eggs count towards your creature space.
What the baby gets
Parts: for each of the five slots, the baby takes that slot's part from one parent or the other. Higher trait levels are more likely to be passed on: a level 3 part beats a level 1 part two times out of three.
Level ups: each inherited part has a 10% chance to come out one level higher (up to 5). This is how you build a level 5 digger over several generations.
Mutations: each egg has a 5% chance that one slot gets a random part from outside both parents, at level 1, along with a brand-new accent colour.
Name and looks: the name joins the first half of one parent's name to the second half of the other's (an Emberwing and a Quartzmole might make an Embermole). Colours blend and size averages out.
Rarity is the rarer of the two parents, which sets how long the egg takes.
Generation counts up by one each time; the panel keeps track of each creature's parents.
Incubation
Egg rarity
Incubation
With a warm nest
Common
1 minute
30 seconds
Uncommon
2 minutes
1 minute
Rare
4 minutes
2 minutes
A hatchery nest on your land (Construction 3) halves the time while it's warm. Burn logs in it from the Creatures panel: each log adds heat and the nest holds up to an hour.
Fuel
Heat per item
Pine logs
1 minute
Oak logs
2 minutes
Willow logs
2½ minutes
Maple logs
4 minutes
Ironbark logs
8 minutes, and +5% mutation chance for eggs that hatch while it burns
Palm logs
2 minutes
Emberwood logs
10 minutes
Emberbean (crop)
15 minutes
Treats
Three crops (see Farming) can be fed to an egg, one of each per egg, from the button next to it in the Creatures panel:
Treat
Effect
Moonpetal
A quarter of the egg's incubation is done at once
Glimmerleaf
+15% chance it hatches with a mutation
Starbloom
Its strongest useful trait hatches one level higher
Feral blood
Catching a feral in the Wildlands (see The Wildlands) is another way to get stronger parts: a caught feral comes out with one part a level higher than it had.
A breeding plan that works
Pick the one part you want most (say Digging Claws). Breed your two best carriers, keep any baby that got a higher level, and breed it back with the best of the rest. Glimmerleaf and an ironbark fire stack for mutation hunting; starbloom is best saved for an egg whose parents already have the part at a high level.
8The island
Your homestead
Your homestead is your base: a circle of land you claim with a Homestone and fill with buildings. Everyone can see it, and it's where your farming, breeding and smithing happen.
A homestead with crop plots, pens and a nest. Crops keep growing while you're offline.
Claiming land
Gather 10 pine logs. Warden Hale's first quest gives you exactly that.
Walk somewhere you like. It must be at least 36 m from the middle of Market Square, 24 m from anyone else's Homestone and 22 m from a bank or waystone, and it can't be in the Wildlands.
Press B and choose Claim land. A see-through preview follows your mouse: R rotates it, left click places it, right click cancels.
Your claim starts as a circle reaching 10 metres out from the Homestone. Everything you build must go inside it.
Buildings
Press B to open the build menu and place buildings the same way. Each one gives Construction XP.
Building
Construction
Costs
How many
What it's for
Homestone
1
10 pine logs
1
Claims the land around it. Placed with Claim land.
Campfire
1
3 pine logs
4
Cook here. Anyone can use your fire.
Creature pen
1
15 pine logs
3
Room for 5 more creatures (and some of them show in it)
Crop plot
2
6 pine logs
3 (+2 per land step)
Plant seeds in it
Hatchery nest
3
20 pine logs
1
Burn logs in it: eggs hatch twice as fast while it's warm
Log bench
4
6 pine + 2 oak logs
4
Somewhere to sit and watch your creatures
Forge
7
12 oak logs, 10 copper, 10 tin
1
Smelt bars and smith tools, swords and armour
Upgrades
Once you've been to Ember Isle, three buildings can go up a tier. Stand near the building, open the build menu (B) and press Upgrade in the Upgrades list. It's rebuilt where it stands; nothing in it is lost.
Upgrade
Construction
Costs
XP
What it does
Creature pen → Stone pen
35
6 emberwood logs, 4 steel bars
450
Room for 8 creatures instead of 5
Hatchery nest → Ember nest
45
8 emberwood logs, 2 obsidian
600
While it's warm, eggs incubate three times as fast instead of twice
Forge → Obsidian forge
55
6 obsidian, 6 steel bars
900
Every log you feed it gives twice the heat
Your creatures in their pens. A few of the creatures you keep at home wander about inside your pens, where you and your visitors can see them: up to three in a wooden pen and four in a stone one. Your companion and your farmhand are out and about, so they don't count.
A stone pen (left) and a wooden one, each with some of their owner's creatures inside.
Buying more land
In the build menu, Buy more land widens your claim. Each step needs a Construction level, coins and materials, and lets you build two more crop plots. Your land can't grow into a neighbour's, the spawn clearing, a bank or waystone, or the Wildlands.
Step
Radius
Construction
Coins
Materials
Crop plots
Start
10 m
–
–
–
3
1
14 m
8
500
20 oak logs
5
2
18 m
18
2,500
20 willow logs, 10 iron bars
7
3
23 m
30
8,000
25 maple logs, 10 steel bars
9
4
28 m
45
20,000
20 ironbark logs, 5 crystal
11
The build menu, with Buy more land at the top.
Decorations
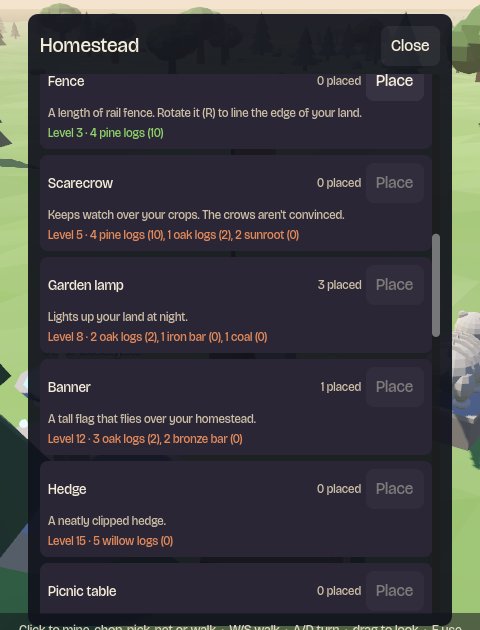
Decorations are just for looks: lamps, flowers, fences, statues and more. They're at the bottom of the build menu (B). Your land holds 12 of them, and 6 more for each land step you buy.
Build one from materials and you get Construction XP, like any building.
Pick one up from the list at the bottom of the build menu (On your land) and it goes into your bag. Place it again anywhere on your land for free (no materials, no XP). That's how you move one. Decorations in your bag can be traded, sold on the Trade Board or sold to the Merchant like anything else.
Decoration
Construction
Costs
Up to
What it is
Flower bed
2
3 pine logs, 2 sunroot seeds
8
A raised bed of bright flowers
Fence
3
4 pine logs
24
A length of rail fence. Rotate it (R) to line your land
Scarecrow
5
4 pine logs, 1 oak log, 2 sunroot
4
Keeps watch over your crops
Garden lamp
8
2 oak logs, 1 iron bar, 1 coal
10
Lights up your land at night
Banner
12
3 oak logs, 2 bronze bars
6
A tall flag over your homestead
Hedge
15
5 willow logs
16
A neatly clipped hedge
Picnic table
20
6 willow logs, 4 oak logs
3
Somewhere for friends to sit when they visit
Creature topiary
30
4 maple logs, 1 glimmerleaf
4
A hedge clipped into a creature
Fountain
40
3 steel bars, 2 crystal, 4 maple logs
1
Water that sparkles day and night
Tiki torch
22
3 palm logs, 1 coal
10
A carved palm-wood torch that burns all night
Hammock
26
6 palm logs, 2 willow logs
2
Strung between two posts, for lazy afternoons
Sun lantern
40
3 sunstone, 2 palm logs
4
A sunstone in a palm-wood cage; glows warm gold all night
Ember brazier
50
2 obsidian, 3 emberwood logs
4
An obsidian bowl of embers that glows red all night
Crystal lantern
50
4 crystal, 2 steel bars
4
Glows blue all night
Some can't be built at all, only earned:
Decoration
How to get it
Species statues (Mossjaw, Emberwing, Skyfin, Glowtail, Quartzmole, Coralback, Cinderhorn)
One for each wild species in your collection log. Your starter's species counts, so everyone starts with one
Meteor fragment
Mine a piece of a meteor (see World events): one fragment per meteor
Raid trophy
Help drive off a raid on Market Square
Thornmaw's thorn
Help bring down Thornmaw, the world boss (see World events)
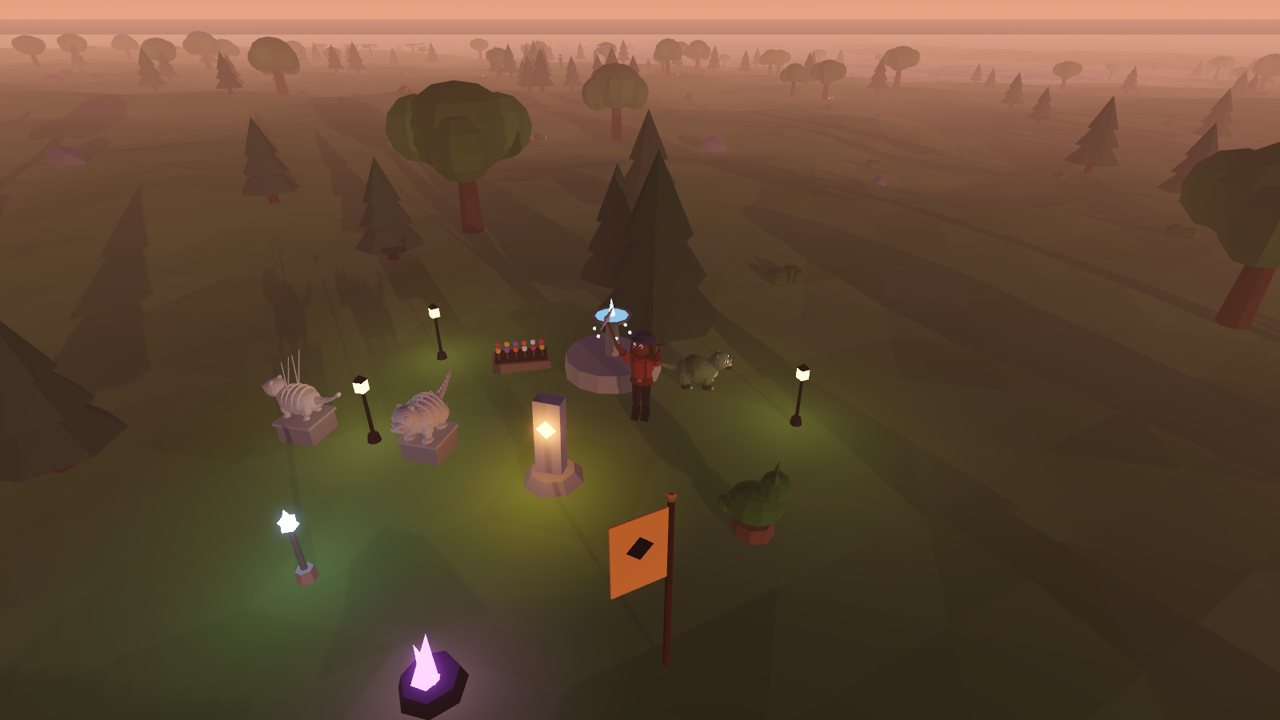
A decorated homestead at dusk: garden lamps and a crystal lantern, two species statues, a topiary, a fountain, a banner and a meteor fragment.Decorations in the build menu, with what each costs.
Visitors
Friends can visit your homestead with the Visit button on their Friends list (see Playing together), and you can visit theirs. You're told when someone arrives.
9Skills
Farming
Build crop plots on your land and plant seeds. Crops grow in real time, even while you're offline, and several of them feed straight back into breeding.
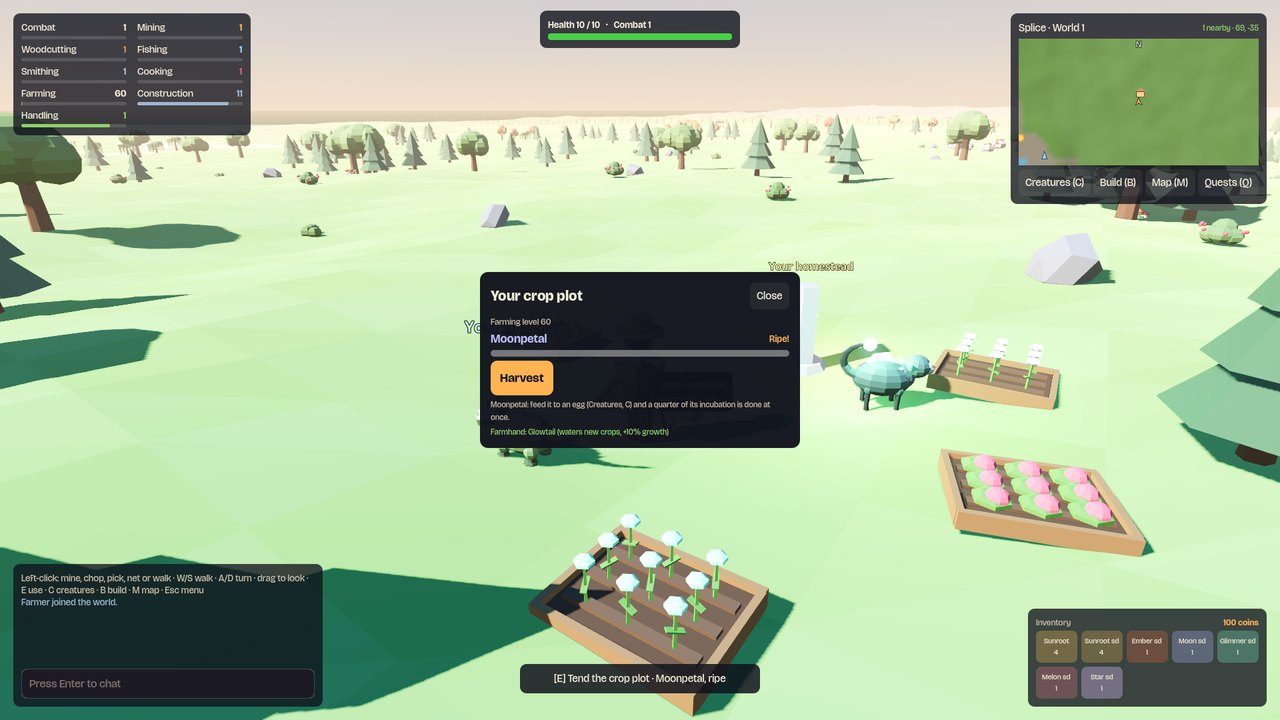
Crops at different stages. Hover a plot to see what's growing and how long it has left.
Growing a crop
Build a crop plot on your land (Construction 2, 6 pine logs). You can have 3 to start and up to 11 with more land.
Click the plot and choose a seed. Planting gives Farming XP.
Wait. Only you can plant and harvest your plots.
When it's ripe, click it to harvest. You also get 0 to 2 seeds back.
Crop
Farming
Grows in
XP plant / harvest
Harvest
Used for
Sunroot
1
3 min
6 / 14
2–4
Cook into roast sunroot
Emberbean
8
6 min
10 / 26
2–4
Nest fuel: 15 minutes of heat
Moonpetal
15
10 min
16 / 42
1–3
Treat: a quarter of an egg's incubation
Glimmerleaf
25
18 min
24 / 70
1–2
Treat: +15% mutation chance
Pineapple
20
15 min
20 / 55
1–3
Food: faster walking and gathering, heals 6. Plant the tops from wild pineapples on Coral Isle
Heartmelon
35
30 min
30 / 95
1–3
Food: heals 20, best for the Wildlands
Starbloom
50
45 min
45 / 160
1
Treat: strongest trait +1 level
Watering
Anyone can water a growing crop once. It takes 30% off the time it has left, and whoever watered it gets 4 Farming XP. Watering your neighbours' crops is a friendly thing to do.
Where seeds come from
Berry bushes: sunroot and emberbean seeds.
Mushroom patches: moonpetal and heartmelon seeds.
Ferals in the Wildlands: glimmerleaf (level 8+ ferals, 25%), heartmelon (level 14+, 15%) and starbloom (level 26+, 12%).
Harvests give 0 to 2 seeds back, and some quests reward seeds. You can also buy them on the Trade Board.
Farmhands
Put one of your creatures to work as a farmhand from the Creatures panel. It wanders your land and helps with its parts:
Gills water every new crop for you.
Glowtail makes crops grow 10% faster per level.
Digging Claws dig up bigger harvests.
A farmhand can't be your companion at the same time; picking it as your companion calls it in from the fields.
10Skills
Smithing and cooking
Smithing turns ore into bars, tools, swords and armour at your own forge. Cooking turns berries, mushrooms, crops and fish into food that speeds you up and heals you.
Your forge
Build a forge on your land (Construction 7: 12 oak logs, 10 copper and 10 tin). Click it to open smithing. Choose what to make and how many; your character keeps working until the count is done or you run out.
The forge needs heat: each bar or item uses one charge. Burn logs in it: pine gives 2 charges, oak 4, willow 5, maple 8, ironbark 16, palm 4, emberwood 12 (all doubled in an obsidian forge), and it holds up to 200. Bring a companion with a Fire Gland (Emberwing blood) and it heats the forge for free.
Smelting bars
Bar
Smithing
XP
Needs
Bronze bar
1
8
1 copper + 1 tin
Iron bar
15
14
1 iron
Steel bar
30
22
1 iron + 2 coal
Starmetal bar
50
45
1 starmetal + 2 coal
Tools, swords and armour
Item
Smithing
XP
Needs
Bronze pickaxe / axe
1 / 2
25
2 bronze bars
Bronze sword
4
30
2 bronze bars
Bronze armour
8
60
4 bronze bars
Iron pickaxe / axe
15 / 16
45
2 iron bars
Iron sword
18
55
2 iron bars
Iron armour
22
110
4 iron bars
Steel pickaxe / axe
30 / 31
90
3 steel bars
Steel sword
33
100
3 steel bars
Steel armour
38
190
5 steel bars
Crystal pickaxe / axe
55 / 56
220
2 steel bars + 3 crystal
Crystal sword
58
240
2 steel bars + 4 crystal
Starmetal sword
66
300
3 starmetal bars
Starmetal armour
72
480
5 starmetal bars
Obsidian pickaxe / axe
68 / 69
280
2 steel bars + 4 obsidian
Obsidian sword
75
340
2 starmetal bars + 5 obsidian
Obsidian armour
80
520
3 starmetal bars + 8 obsidian
Cooking
Cook at any campfire, yours or another player's. Cook Bea, by the market stall, has three quests that take you from mushroom skewers to firefin (see Quests). At low levels you sometimes burn food: 40% at the level you unlock a recipe, falling to never at the "stops burning" level. Click food in your inventory to eat it. You can have one food buff at a time; a new meal replaces the old one. Buffs run in real time, online or not.
Food
Cooking
Stops burning
XP
Needs
Buff when eaten
Heals
Roasted berries
1
20
12
2 berries
+6% move speed, 3 min
2
Grilled sandfish
1
25
20
1 raw sandfish
+6% gathering, 4 min
3
Roast sunroot
5
28
18
1 sunroot
+8% gathering, 5 min
6
Mushroom skewer
10
32
24
2 mushrooms
+10% gathering, 5 min
4
Grilled silverfin
12
36
40
1 raw silverfin
+10% move speed, 5 min
5
Forager's stew
25
50
50
2 berries + 2 mushrooms
+15% gathering, +8% move, 10 min
7
Grilled snapper
28
52
75
1 raw reef snapper
+12% gathering, +4% move, 8 min
8
Smoked stormeel
45
70
120
1 raw stormeel
+18% gathering, +6% move, 12 min
12
Grilled parrotfish
38
62
95
1 raw parrotfish
+14% gathering, +6% move, 10 min
10
Seared firefin
50
76
140
1 raw firefin
+16% gathering, +10% move, 12 min
14
Seared glassfish
60
85
180
1 raw glassfish
+22% gathering, +12% move, 15 min
16
Heartmelon (raw crop)
–
–
–
Grown, not cooked
+5% gathering and move, 10 min
20
Which food to carry
For gathering trips, the best buff you can make. For the Wildlands, food that heals: grilled snapper and better, or heartmelon (heals 20) if you farm.
11The island
Trading
The market stall in Market Square is where coins change hands. Click it, or press E next to it, to open The Market.
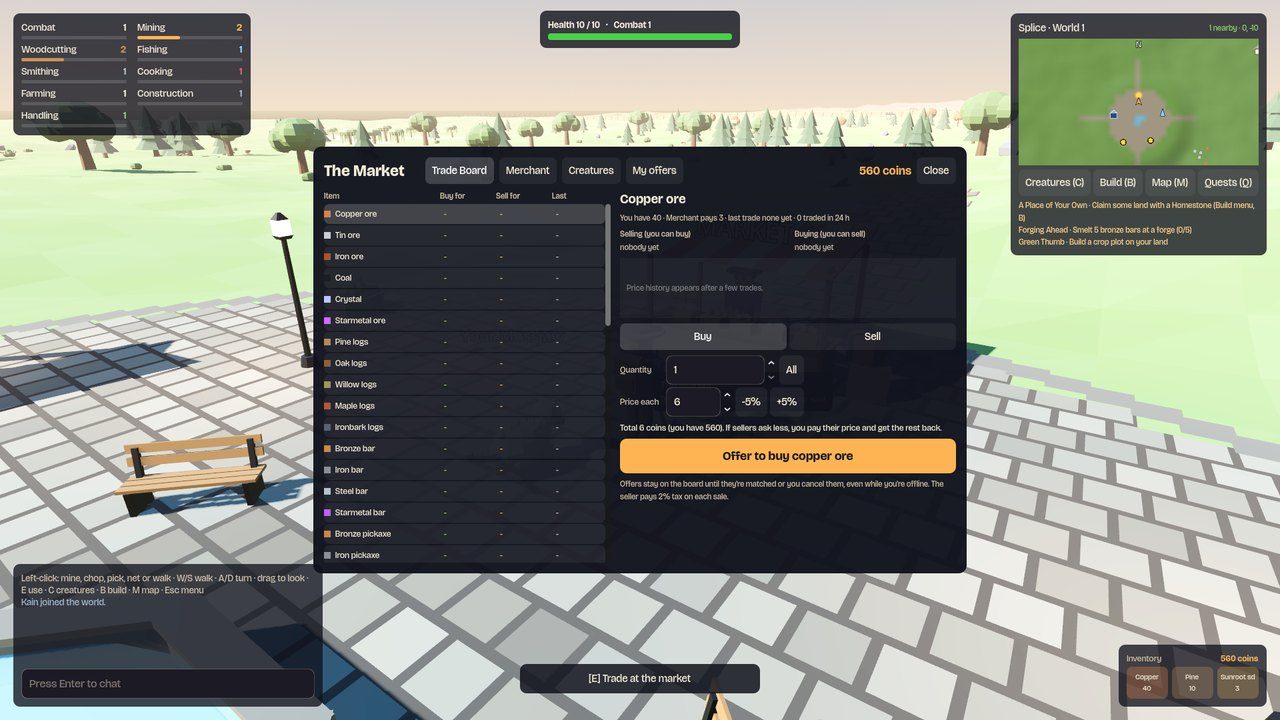
The Trade Board: buy and sell offers for any item, the order book and a price-history chart.
Swapping with someone in person
To trade directly with a player standing next to you (coins, items or creatures, both of you accepting), use the trade window instead: see Playing together.
The four tabs
Trade Board
Place buy or sell offers for any item at your own price, like RuneScape's Grand Exchange. Offers match automatically with other players' and keep working while you're offline.
Merchant
Oda the Merchant buys anything for half its value, instantly. He never sells. It's the floor price for every item (see Merchant prices).
Creatures
List a creature at a fixed price (up to 5 at a time), or buy one someone else has listed. You can't list your companion or your last creature.
My offers
Your open offers with progress bars, and a Cancel button to take back whatever hasn't traded.
How the Trade Board works
When you place an offer, the items (to sell) or coins (to buy) are held until it fills or you cancel.
Offers are matched best price first, then oldest first, always at the price of the offer that was already waiting. If you offer to buy at 20 and someone is already selling at 15, you pay 15 and get the difference back.
Offers can fill a bit at a time. You can have 8 offers open.
Sellers pay a 2% tax on each sale. It leaves the game, which keeps prices steady.
Each item has a price-history chart and recent trades, so you can see what it's really worth before you post.
If something traded while you were away, a "While you were away" note tells you when you log in.
Getting your first coins
Sell surplus ore and logs to the Merchant for guaranteed coins, or post them on the Trade Board a little above his price. Quests also pay coins: Warden Hale's four pay 530 between them.
12The island
Getting around
The island takes about four minutes to cross on foot. The map, home teleport and the waystones save you most of that walking.
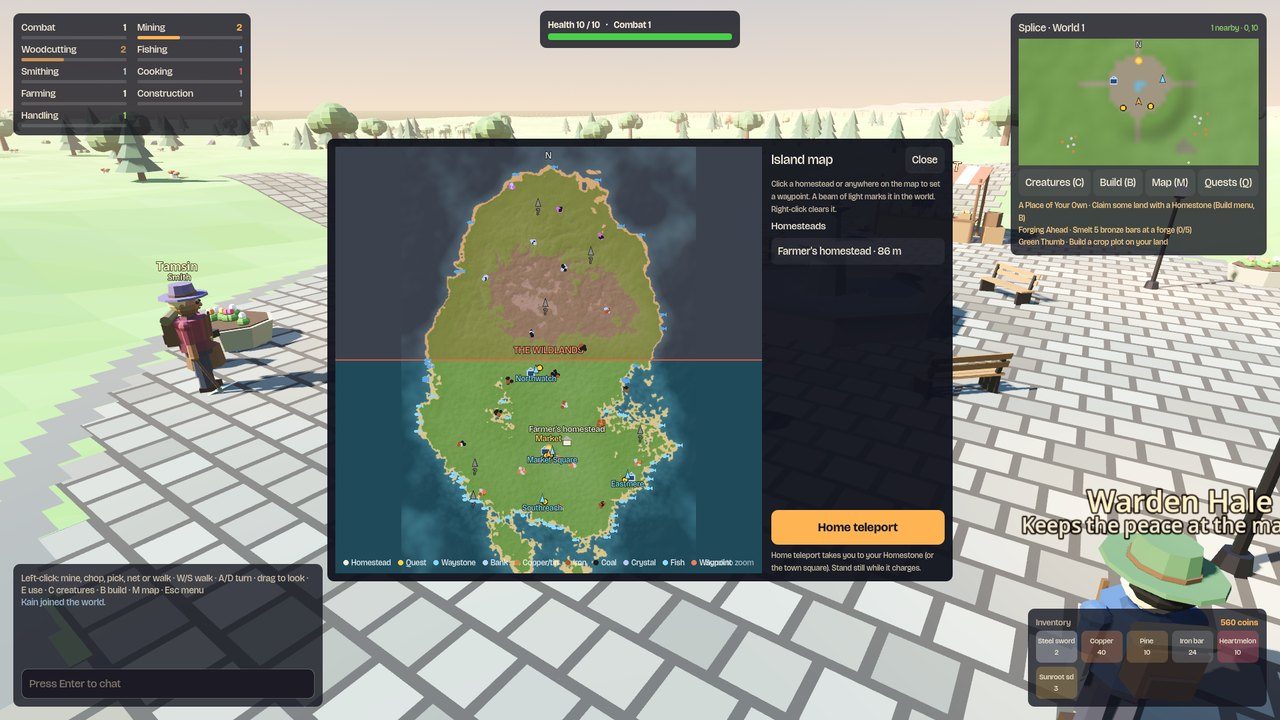
The island map (M). Scroll to zoom, drag to move, click anywhere to set a waypoint.
The map and waypoints
Press M for the island map. It shows every homestead, banks, waystones, quest givers, ore rocks and players near you. Banks and waystones you haven't found yet show as a ?. Click a homestead or any spot to set a waypoint: a beam of light in the world, with the distance and direction on screen. Right click clears it.
Home teleport
From the map, Home teleport takes you to your Homestone after a 5-second cast. You can use it once every 3 minutes, and not deeper than depth 20 in the Wildlands.
Banks
There are five banks: Market Square (west side of the square), Eastmere (east coast), Northwatch (just south of the Wildlands border), Coral Isle and Ember Isle (both by the jetty). Click the counter or press E. Your pack is on the left and the bank on the right; click an item to move 1, 10 or all of it, or press Deposit everything.
Bank before you go north
Anything in the bank is safe whatever happens to you. Anything you carry into the Wildlands can be lost if you die there.
Waystones
Ten standing stones stand around the island. Walk up to one to attune to it (its runes light up). After that, from any waystone you can travel to any stone you've attuned to, after a 3-second cast. Moving cancels it. Waystones work at any depth, so they're also your way out of the deep Wildlands.
Waystone
Where
Safety
Notes
Market Square
East side of the square
Safe
Known from the start
Southreach
South, where Old Maren lives
Safe
Eastmere
East coast, by the bank and Gardener Ivy
Safe
Westwood
West
Safe
Mirewater
South-west
Safe
Sunhollow
East, north of Eastmere
Safe
Northwatch
Just south of the Wildlands border
Safe
By the bank and Captain Rook
The Broken Spire
Wildlands
Depth 16
Ashen Gate
Wildlands
Depth 30
Starfall
Deep Wildlands, by the starmetal
Depth 43
13The island
Coral Isle
Out at sea to the south lies Coral Isle: white beaches, palms and a jungle hill. A ferry takes you across from the south coast. It's safe (no ferals, no player fights) and there are things there you can't find anywhere else.
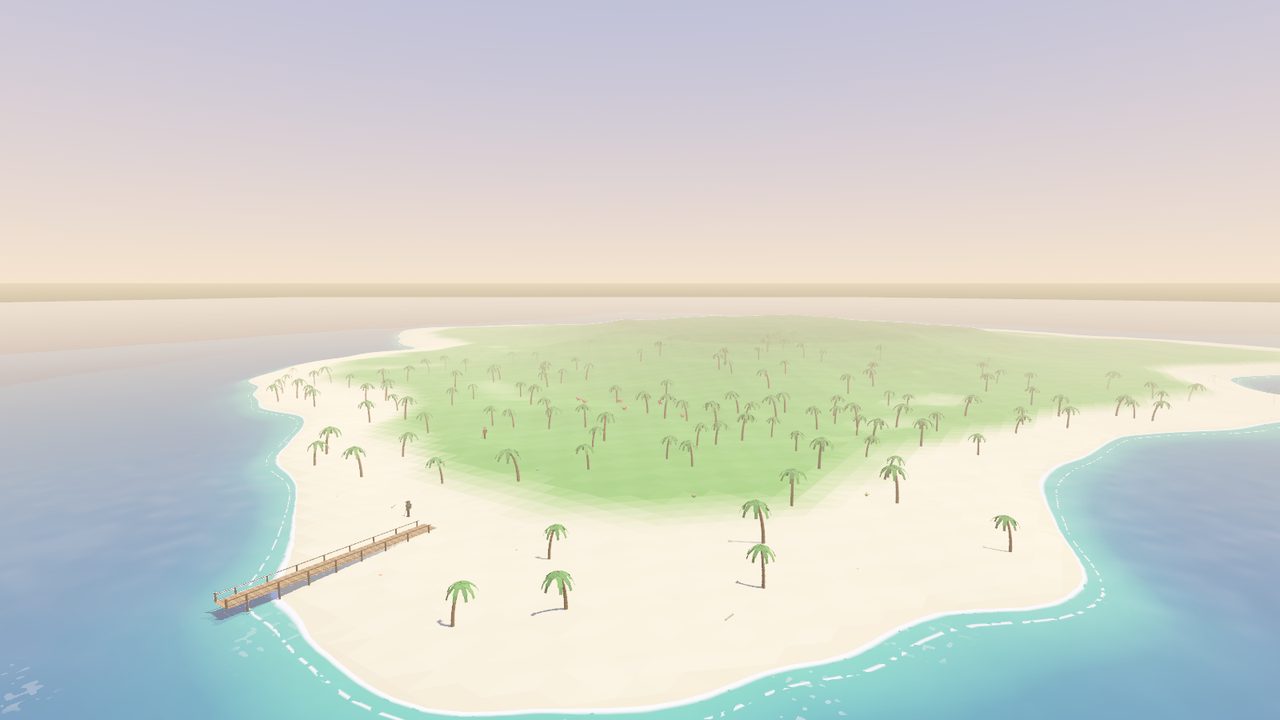
Coral Isle from the air, with the ferry's jetty on its northern beach.
Taking the ferry
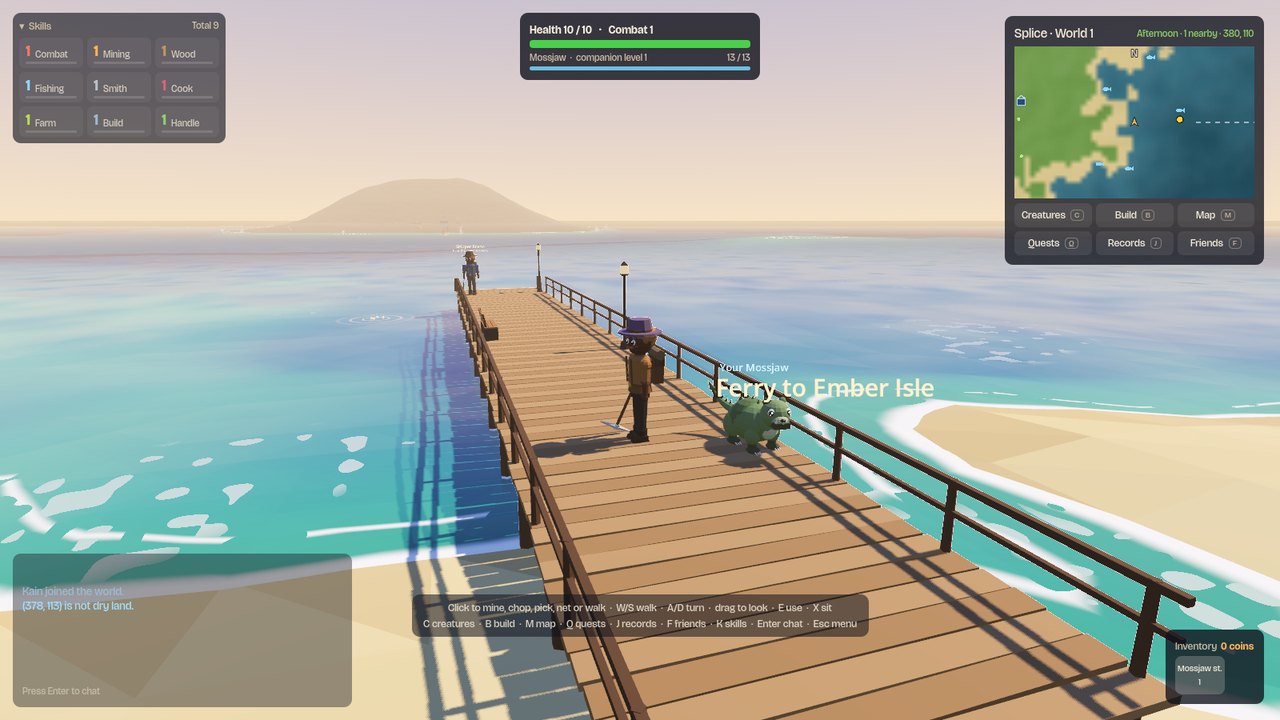
Go to Southreach Pier on the south coast, just south of the Southreach waystone, and walk out along the pier. Ferryman Joss stands at the far end.
Talk to him. If the ferry is in, press Board (20 coins). If it's out, he tells you when it'll be back. The island map (M) shows the same: when the boat next leaves or gets back to each pier.
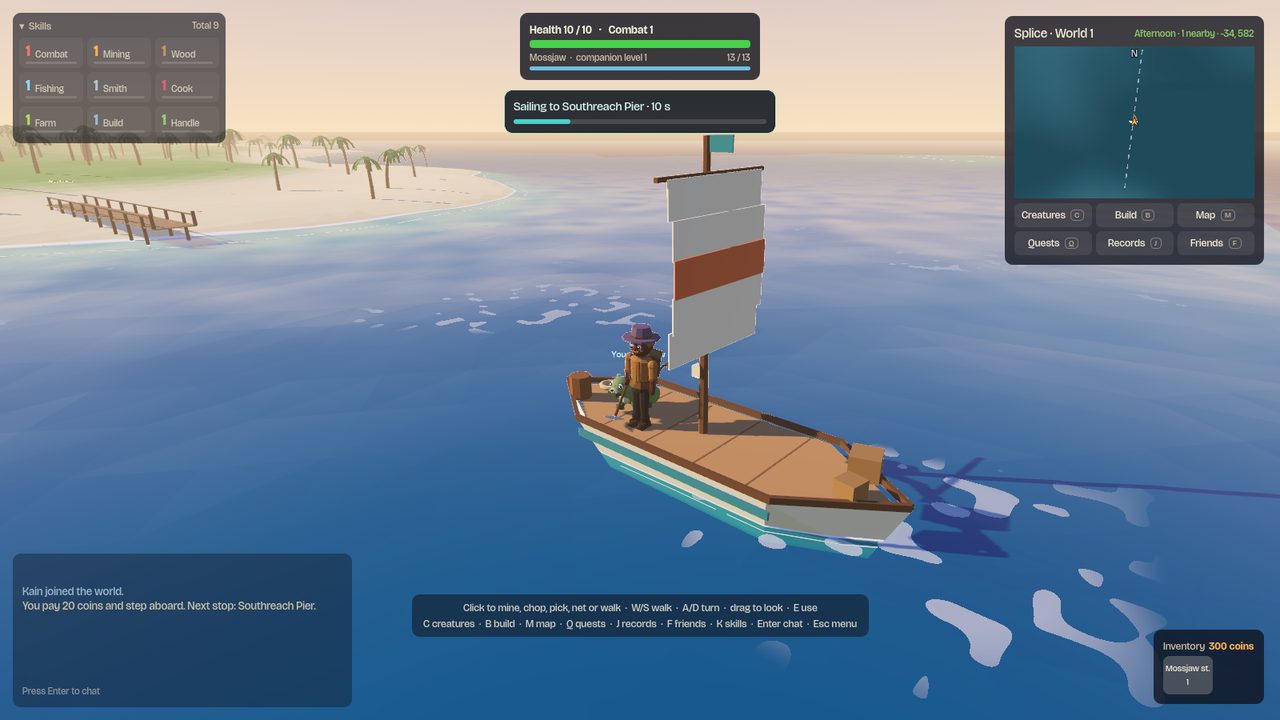
The ferry waits about 20 seconds at each end, then sails. The crossing takes about 36 seconds. You stand on deck and can't walk about; enjoy the view.
At the other end you step off at the end of the isle's jetty. To come back, talk to Lani out there; the fare is the same.
On deck, halfway across. The bar at the top shows where you're going and how long it'll take.
Changed your mind? Step off (on the bar at the top, or with the ferry hand) before it sails and your fare is refunded.
If you log out on board, you're put ashore: on the pier if it hadn't left, or where you were sailing to.
Home teleport works from the isle (and even from the deck). There's no waystone on the isle.
The jetty
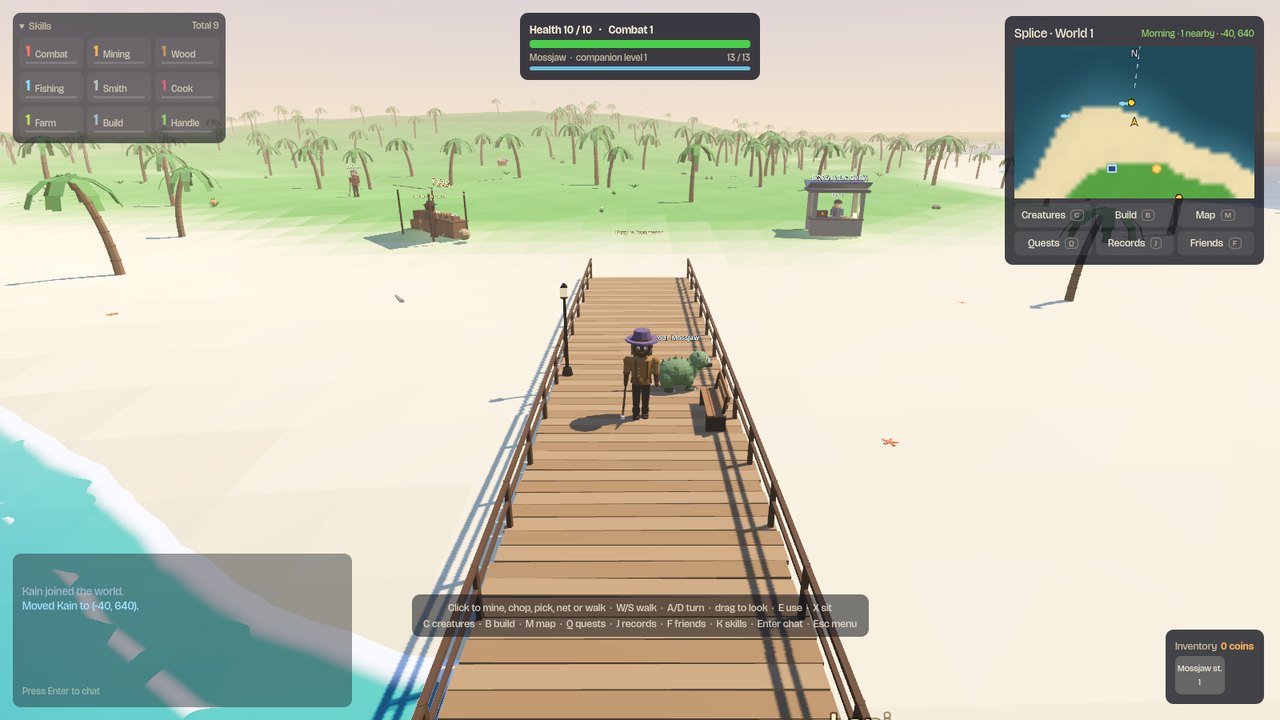
Both piers are wide wooden decks (5.2 metres across), with lamps, a bench and room to stand and fish. Each has a fishing spot off its far end: the shallows at Southreach, the lagoon at the isle. At the landward end of the isle's jetty there's a trading post (another Merchant, and the same Trade Board as Market Square) and a bank, so you can sell your catch and bank your pearls without sailing home.
Walking up Coral Isle's jetty: the trading post on the left, the bank on the right.
What's there
What
Needs
Where and why
Palms
Woodcutting 20
All over the island. Palm logs build the island decorations and burn in your forge and nest.
Sunstone
Mining 35
Rocks on the hill. Glows warm gold; set in a sun lantern it lights your garden all night.
Parrotfish
Fishing 35
Lagoon spots all round the coast. Grilled, it's one of the best foods for gathering.
Wild pineapples
No level
Pick them in the grass. Eat them as they are, and plant the tops at home (Farming 20).
Coralbacks
Catch them
On the beaches. Gills, Runner legs and a Pearl Diver bill (below).
Coralbacks on the east beach in the evening.
Coralbacks and pearls
The Coralback is the only wild species that lives on the isle. Its Pearl Diver bill finds pearls while you fish: with a Coralback as your companion, every catch has a 5% chance per trait level of bringing up a pearl as well. Pearls are worth a good deal to the Merchant, and Marisol has a use for one. Breed the Pearl Diver into your other creatures like any other part.
Rules of the isle
Coral Isle belongs to everyone: you can't claim land there. Build your homestead on the main island.
No ferals and no fighting between players: the whole isle is safe.
Marisol, who keeps the island, has three quests for you once Fisher Nell has sent you over (see Quests).
13The island
Ember Isle
Out to the east of Eastmere a volcano smokes on the horizon: Ember Isle. A second ferry takes you across. There's obsidian at the top, emberwood on the slopes, firefin over the hot vents, and creatures in the crater that don't like visitors.
Eastmere Pier, with Skipper Brann at the end and Ember Isle on the horizon.
Taking the ferry
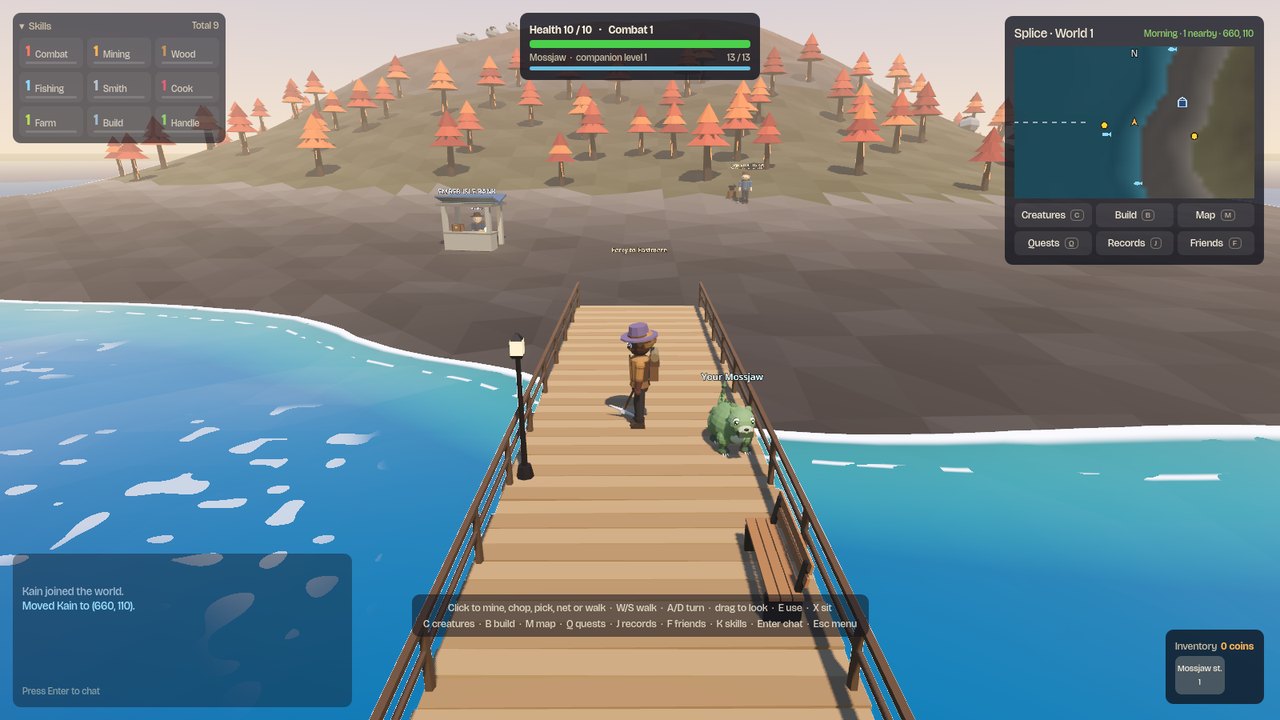
Skipper Brann runs the boat from the end of Eastmere Pier, just east of Eastmere's bank and waystone. It works just like the Coral Isle ferry: 30 coins, about 20 seconds in port and 30 seconds across. You step off at the end of Ember Isle's jetty, where Kiri runs the boat back.
Stepping off at Ember Isle: the bank at the top of the jetty and emberwood up the slopes.
What's there
What
Needs
Where and why
Obsidian
Mining 60
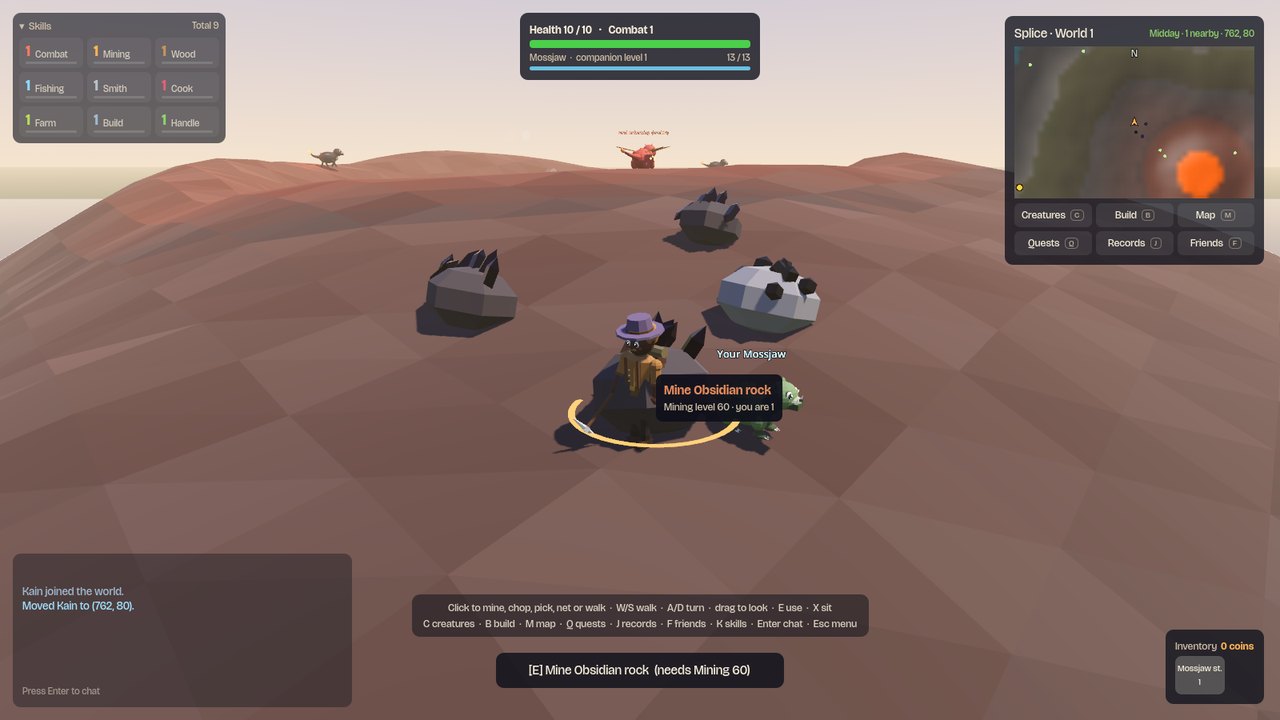
Rocks high on the cone, around the crater: black glass that makes the best tools, sword and armour there are (see Smithing).
Emberwood
Woodcutting 55
The red forest on the slopes. Burns far longer than oak in your nest and forge, and builds the upgrades.
Firefin
Fishing 50
Hot vents all round the coast, where the steam rises. Seared firefin is a strong gathering food.
Cinderhorns
Catch them
On the lower slopes. Stone Hide, Runner legs, a Crusher jaw and a Cinder Tail (below).
Coal and iron
Mining
A few rocks on the western slope.
Obsidian rocks just below the crater rim. The creatures on the skyline are the crater's.
The Cinder Tail
The Cinderhorn is the only wild species on Ember Isle. Its Cinder Tail glows like a coal, and a companion with one makes you a better cook: every level takes 20% off your chance of burning food, so a level-5 Cinder Tail means you never burn anything. Breed it into your other creatures like any other part.
The crater
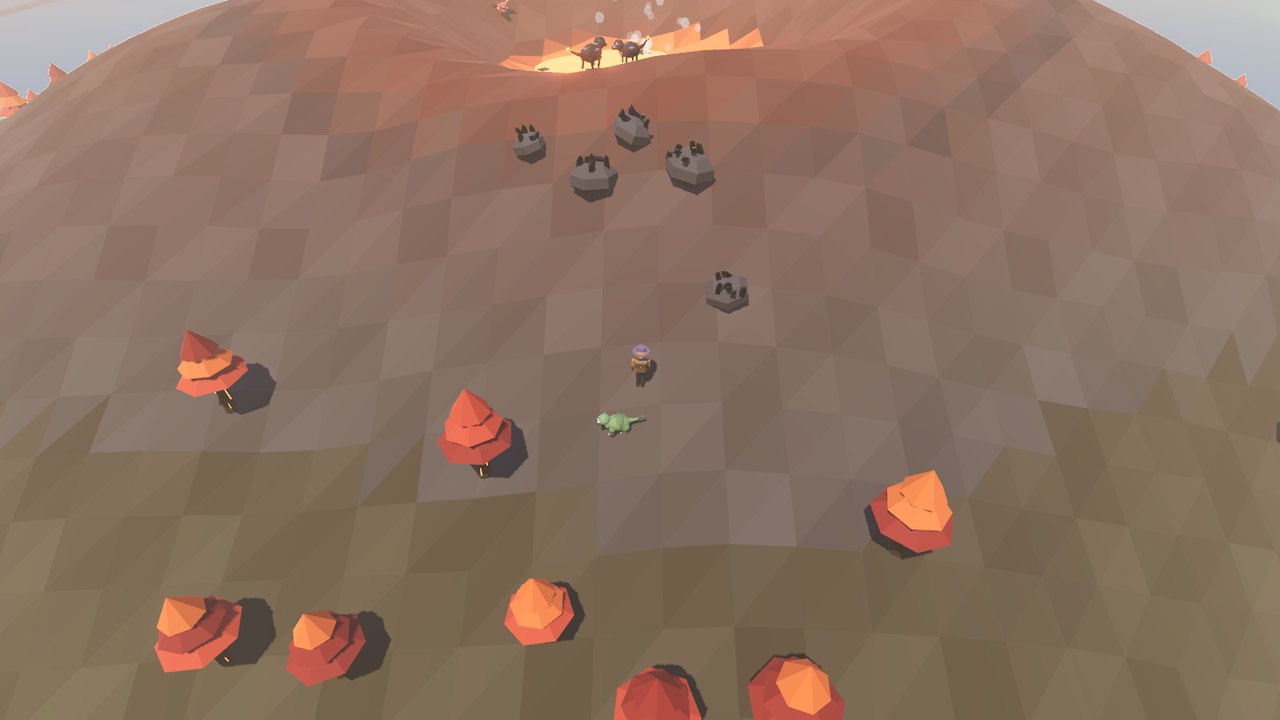
At the top of the volcano is a crater with a lava lake in it (you can't walk on the lava). The creatures living up there have gone wild with the heat and attack anyone who comes near: two Cinderhorns (level 30), two Emberwings (level 24) and one big Cinderhorn (level 34). Defeat them as you would ferals in the Wildlands. A banner warns you as you climb over the rim.
Ember Isle isn't the Wildlands
Nobody can attack other players there, and if a crater creature beats you, you wake up in Market Square with everything you were carrying. It just costs you the trip back.
Looking up at the crater: the lava lake, and the creatures that guard it.
Rules of the isle
Nobody claims land on Ember Isle either, and there's no waystone. Home teleport works.
There's a bank at the top of the jetty, so you can bank your obsidian before going up the crater.
Forgemaster Harrow, by the jetty, has three quests once Tamsin has sent you over (see Quests).
14The island
Quests
Twelve people around the island and out on the isles have 43 quests for you, from your first copper ore to a rescue at the far north of the Wildlands and the hunt for Thornmaw. A gold ! over someone's head means they have a quest; a ? means you can hand one in.
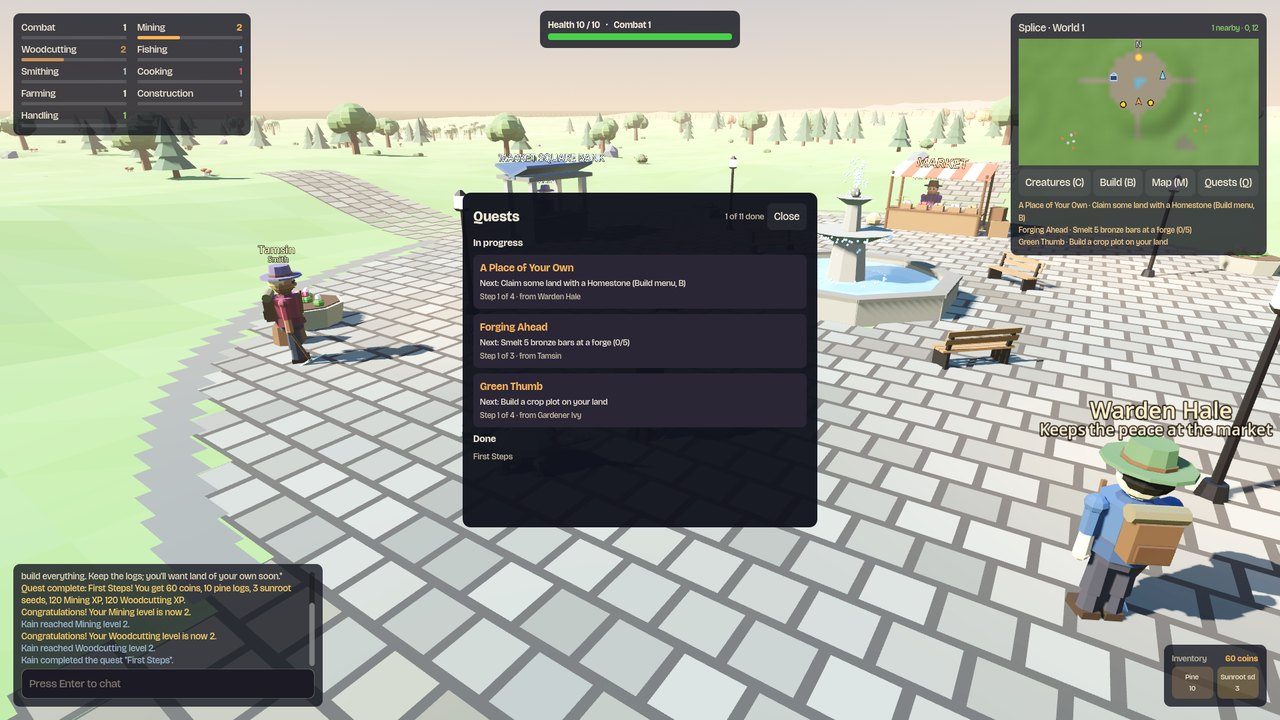
Talking to a quest giver: the job, the reward and Accept.The quest log (Q): what you're on and what's next.
How quests work
Click a quest giver or press E next to them. They explain the job and the reward, and you choose whether to accept.
Steps tick off by themselves as you play. "Talk to" steps and hand-ins finish when you speak to the person.
Steps you've already done (you already have land, a campfire, something in the bank) are skipped.
Some steps send you somewhere: walk up to the place (a waystone, a camp, a cairn) and the step finishes when you arrive.
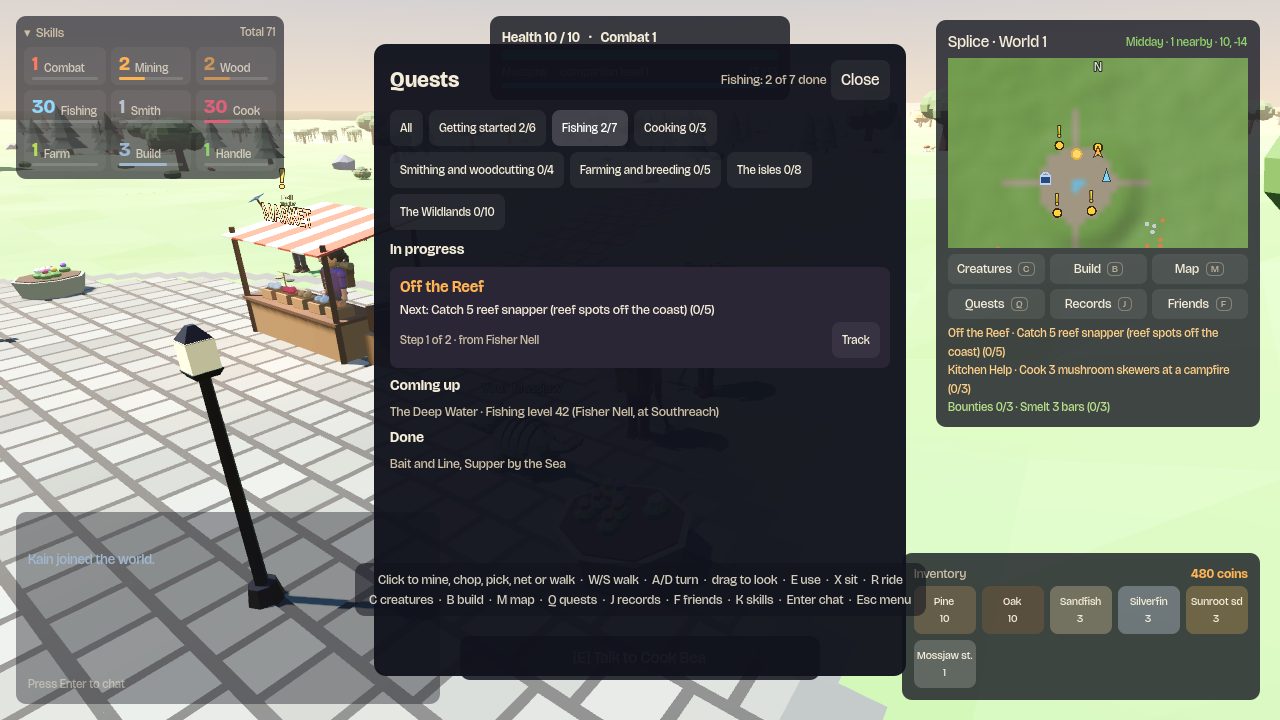
Press Q for the quest log. Show on map sets a waypoint to wherever your next step is (a person, a place or a waystone). Track chooses which three quests show under the minimap. Coming up lists quests that open once a skill is high enough.
The buttons along the top of the log narrow it to one quest line (fishing, cooking, the Wildlands...), with how many of that line you've done.
Quest givers are on the map.
You can abandon a quest and start it again later.
Quest lines
Every quest belongs to one line. Finish every quest in a line and it's a collection milestone (see Records), with a reward of its own. Characters who had already finished a line get it the next time they log in.
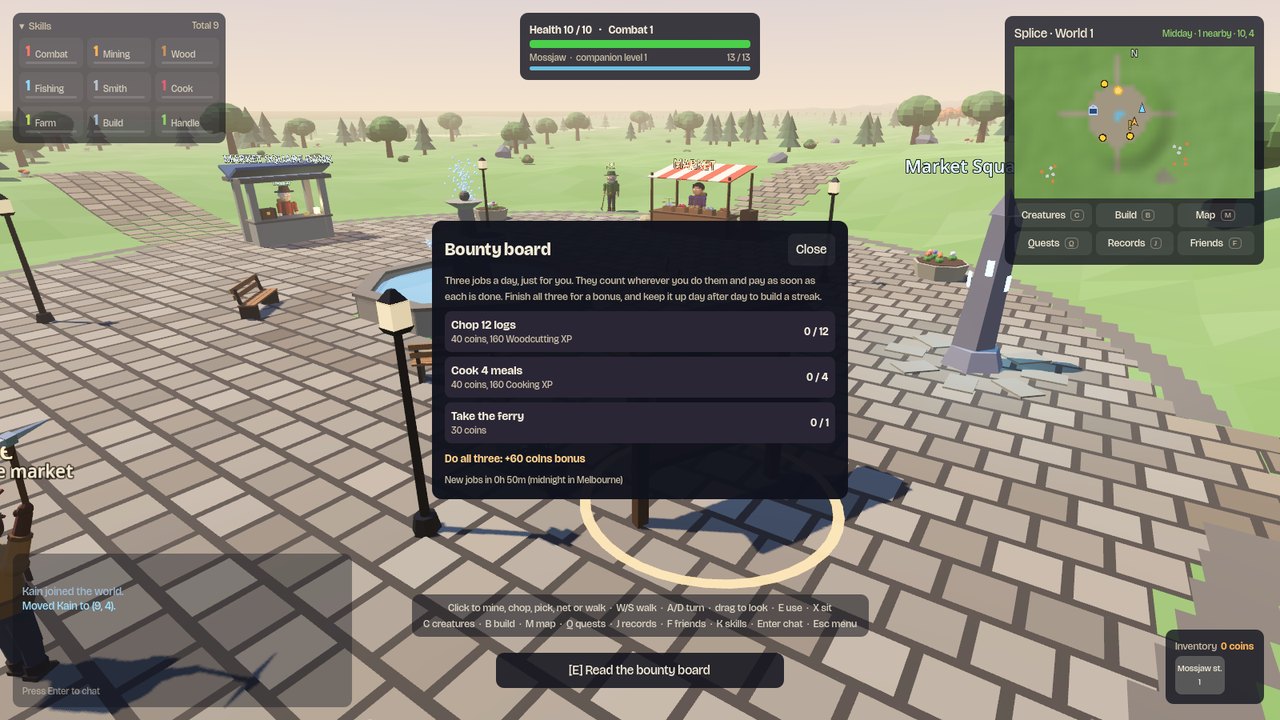
On the east side of Market Square stands the bounty board. Each day it posts three jobs just for you (other players get their own). Click it or press E beside it to see them. You don't have to accept anything: the jobs count wherever you do them, and each pays as soon as it's done.
Do all three in a day for a bonus of 60 coins.
Do all three on days in a row to build a streak: each day of the streak adds 20 coins to the bonus, up to 180 coins from day 7 on. Miss a day and the streak starts again.
New jobs go up at midnight, Melbourne time. The board shows how long is left.
The bounty board: today's three jobs, how far along you are, and the bonus for finishing them all.
Job (any three a day)
Pays
Breed two of your creatures
50 coins, 180 Handling XP
Net a wild creature
50 coins, 150 Handling XP
Chop 12 logs
40 coins, 160 Woodcutting XP
Cook 4 meals
40 coins, 160 Cooking XP
Take the ferry
30 coins
Catch 6 fish
45 coins, 180 Fishing XP
Harvest 6 crops
45 coins, 170 Farming XP
Mine 12 ore
40 coins, 160 Mining XP
Mine 8 copper ore
30 coins, 110 Mining XP
Plant 4 seeds
30 coins, 100 Farming XP
Sell 10 things to a merchant
35 coins
Smelt 3 bars
45 coins, 170 Smithing XP
Who's who
Quest giver
Where
Teaches
Warden Hale
Market Square, south of the fountain
The tutorial chain
Tamsin
Market Square, by her anvil
Smithing
Gardener Ivy
Eastmere, on the east coast
Farming
Old Maren
Southreach, to the south
Breeding
Pell
Market Square, beside the market stall
Trading
Fisher Nell
Southreach, by the waystone
Fishing, from sandfish to glassfish, and her husband's rod
Cook Bea
Market Square, east of the market stall
Cooking
Marisol
Coral Isle, up the beach from the jetty
Coral Isle
Forgemaster Harrow
Ember Isle, at the top of the jetty
Obsidian, emberwood and the crater
Bram
Westwood, by the waystone
Woodcutting
Captain Rook
Northwatch, by the Wildlands border
The Wildlands, the story of the missing scout, and Thornmaw
Scout Wren
Starfall, deep in the Wildlands (you'll meet her in the story)
The story of the missing scout (four quests from Captain Rook, after Into the Wilds) isn't listed here: we won't spoil it.
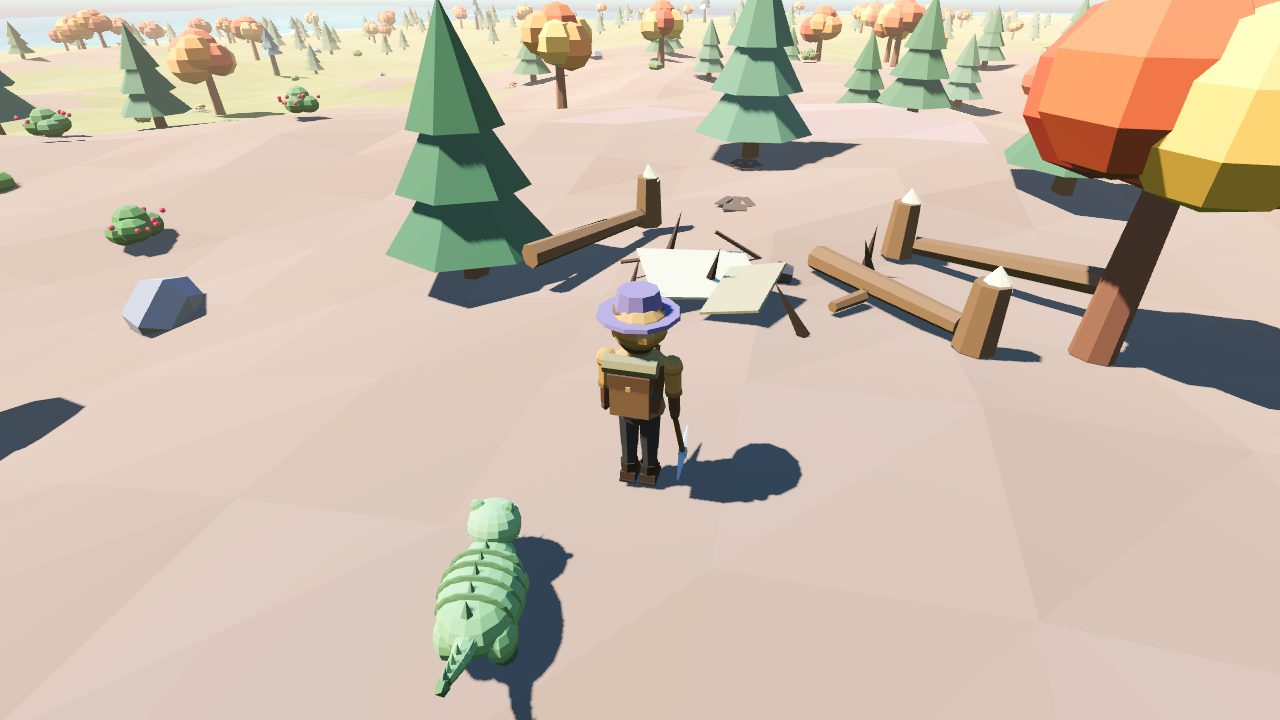
What's left of the hunters' camp, in "Signs of the Behemoth".
15The island
The Wildlands and combat
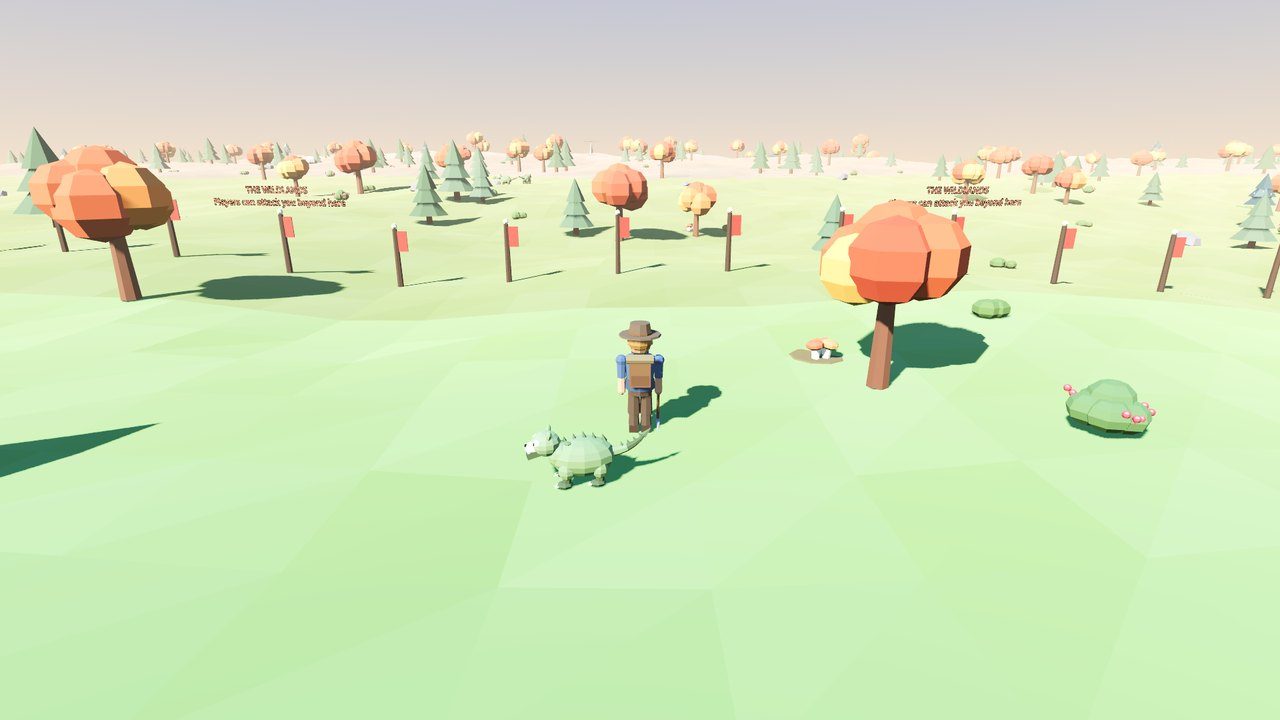
North of the red-bannered posts lies the Wildlands: half the island, with the best resources in the game, feral creatures that attack on sight and other players who can attack you.
Red banners mark the border. Crossing it shows a warning.Starmetal, deep in the north.
Depth
A badge at the top of your screen shows how deep you are: depth 1 at the border, one more every 14 metres north, about 53 at the northern sea. The deeper you go, the tougher the ferals and the better the resources. Home teleport stops working deeper than depth 20, but waystones work everywhere. You can't claim land in the Wildlands.
What's up there
Crystal (Mining 55, needs a Gem Cutter companion) from about depth 8.
Starmetal (Mining 40), the best ore, from about depth 34, for the best swords and armour.
Ironbark trees (Woodcutting 60, needs a Crusher jaw).
Deep-water fishing under the northern cliffs: stormeel and glassfish.
Ferals, which drop coins, ore, fish and rare seeds.
How fighting works
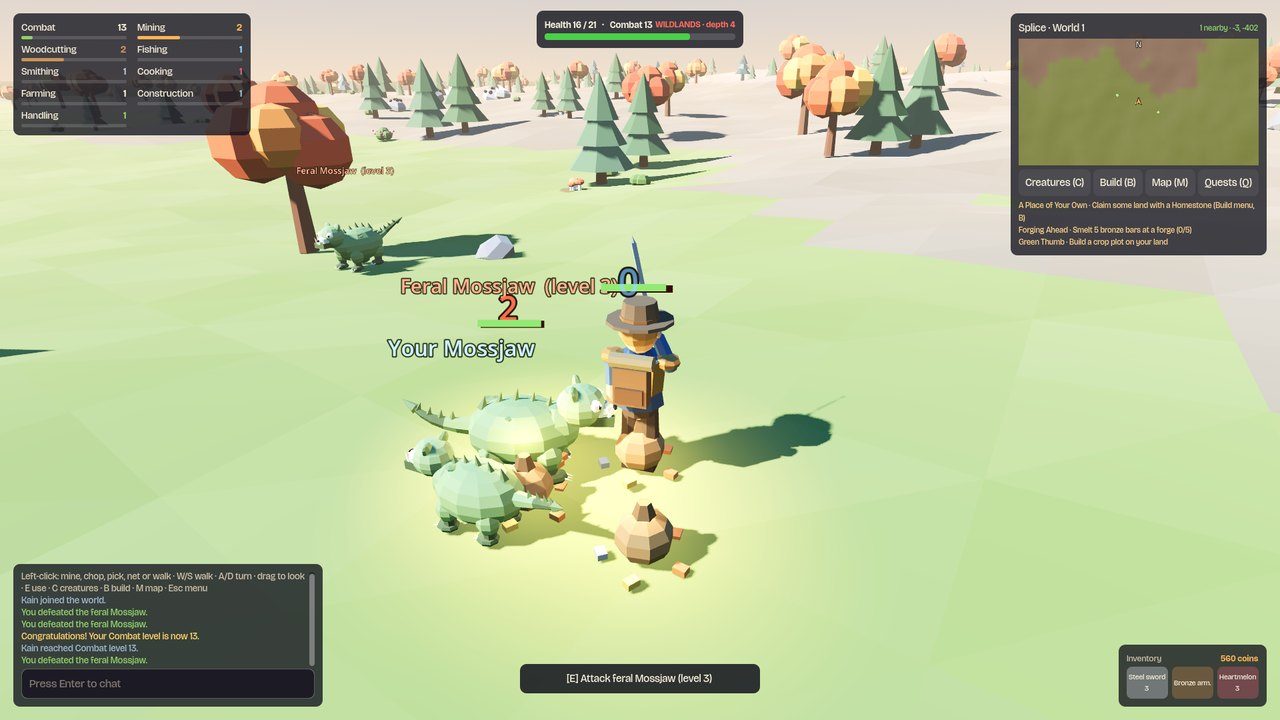
Click a feral (or, in the Wildlands, another player) to attack. Once you've picked a target you attack automatically, one swing every 2.4 seconds, until one of you falls or you walk away. Each swing's chance to hit is your accuracy against their defence; if it hits, it does up to your max hit. Damage numbers and health bars show over everyone in a fight.
Health is 10 plus about one per Combat level (10 at level 1, 19 at level 10, 55 at level 50, 99 at level 99).
Accuracy, defence and max hit all rise with your Combat level.
Swords and armour add to them. Like tools, you use the best of each that you carry and have the Combat level for. There's nothing to equip.
Your companion helps: a Spiked tail adds +1 max hit per level, Stone Hide adds +6 defence per level, and it fights ferals beside you (see Your companion).
Eating heals you (see the food table in Cooking). Eat between hits.
Combat XP: 4 per point of damage you deal, plus 10 × the feral's level for a kill.
Gear
Combat level
Max hit
Accuracy
Defence
Bronze sword
1
+2
+10
–
Iron sword
10
+4
+20
–
Steel sword
25
+6
+32
–
Crystal sword
45
+9
+45
–
Starmetal sword
60
+12
+55
–
Obsidian sword
70
+14
+62
–
Bronze armour
1
–
–
+12
Iron armour
10
–
–
+22
Steel armour
25
–
–
+34
Starmetal armour
60
–
–
+52
Obsidian armour
70
–
–
+62
Ferals
Ferals attack anyone who comes close. They're tougher the deeper they live. Each drops coins (roughly 4 to 7 × its level), sometimes ore (35%) or fish (12%), and sometimes rare seeds.
Species
Level
Health
Depth
Where
Mossjaw
3
15
About 4
Just over the border, north of the square
Mossjaw
6
24
About 6
North-west
Emberwing
10
36
About 11
Glowtail
14 and 17
48 / 57
16 to 19
Near The Broken Spire
Quartzmole
22 and 26
72 / 84
25 to 32
Around Ashen Gate
Skyfin
30 and 34
96 / 108
37 to 40
Past Ashen Gate
Emberwing
38 and 42
120 / 132
44 to 48
Near Starfall and the northern sea
Catching a feral: knock it below a third of its health, then throw your net. You get +25% on your usual catch chance, and it comes out with one part a level stronger. If you miss, it turns on you.
Fighting other players
You can only attack another player when you're both in the Wildlands.
Level brackets: you can only attack players whose Combat level is within 5 + depth of yours, using the shallower of your two depths. Just over the border that's 6 levels either way; at depth 20 it's 25. The Wildlands badge at the top of your screen shows the levels you can fight where you are, and a player you can't fight says so when you point at them. If one of you walks shallower and the other drops out of range, the fight ends.
Whoever strikes first gets a skull over their head for 10 minutes. Fighting back doesn't skull you.
A player fight ends as soon as either of you steps out of the Wildlands.
Logging out won't save you: if you disconnect within 10 seconds of a fight, your character stays where it was, fighting back, until the fight has been over for 10 seconds.
Dying
What you lose
If you die in the Wildlands you keep your 3 most valuable single items (none if you're skulled) and drop everything else in a loot pile where you fell. Your killer gets it for 1 minute, then anyone can take it; it disappears after 3 minutes.
Your coins, creatures, bank and homestead are always safe. You wake up in Market Square with full health.
A fight in the Wildlands: health bars and damage numbers over both fighters.
Before you cross the border
Bank everything you can't afford to lose. Northwatch bank is right by the border.
Bring food that heals, and your best sword and armour.
Take a companion with a Spiked tail or Stone Hide.
Attune to the Wildlands waystones as you find them: they're your way home.
Don't go deeper than depth 20 unless you know where the nearest waystone is.
16The island
World events
Now and then something happens that everyone on the world hears about: a banner across the screen, a line in chat and a star on the map. They're worth dropping what you're doing for.
Raids on Market Square
Some nights (about half of them) ferals come down from the north and raid Market Square. There are 3 to 8 of them, more when more players are online, and they're stronger when the players online are (up to level 18). They attack anyone in the square, but leave newcomers below Combat 10 alone unless attacked, and leave you alone for a minute after you wake up there. Dying to a raider costs nothing: Market Square is outside the Wildlands.
Everyone who hurts a raider (or whose companion does) shares the reward once they're all beaten: 40 coins and 25 Combat XP per raider level, a heartmelon and a raid trophy for your homestead. Party members on the square share in it too. If they aren't beaten within 8 minutes, they slink back into the night.
Meteors
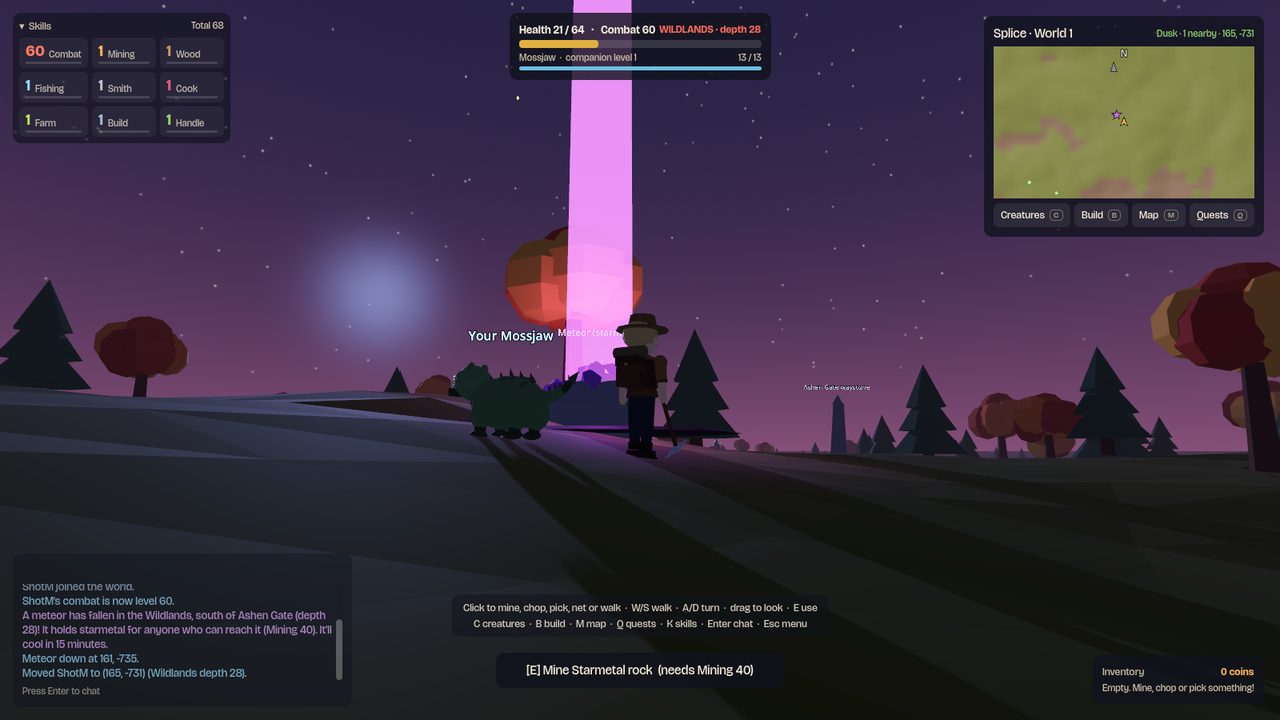
Every 40 to 80 minutes a meteor falls somewhere in the Wildlands, between depth 8 and 30. It holds 20 starmetal for anyone who can reach it (Mining 40), first come, first served, and cools after 15 minutes. Everyone who mines a piece also takes home a glowing meteor fragment to decorate their homestead (one per meteor). A beam of light marks it from far off, the announcement says roughly where, and a purple star on the map shows exactly. Other players will be heading there too.
A fallen meteor at dusk: its beam can be seen from far away, and a star marks it on the minimap.
Rare creatures
Every 30 to 60 minutes a rare creature is seen somewhere south of the Wildlands: a wild one with one of its parts at trait level 3 or 4. The announcement says what it is, what's special about it and roughly where; a green star marks it on the map. It stays for 10 minutes, so be quick with your net. Whoever catches it is announced to everyone.
The world boss: Thornmaw
Every 2 to 3 hours, when at least two players of Combat 30 or more are online, Thornmaw, the Behemoth wakes somewhere deep in the Wildlands (depth 22 to 32). It's a level 45 feral three times the size of anything else, and it takes a party to bring down. The announcement says roughly where; a red star marks it on the map, and a boss bar under your health shows its health, how many are fighting and how long it'll stay (20 minutes) while you're near it.
It gets tougher the more of you there are. It starts with 800 health and gains 300 for each player who joins the fight (up to six), so a big party doesn't flatten it and a small one can still win.
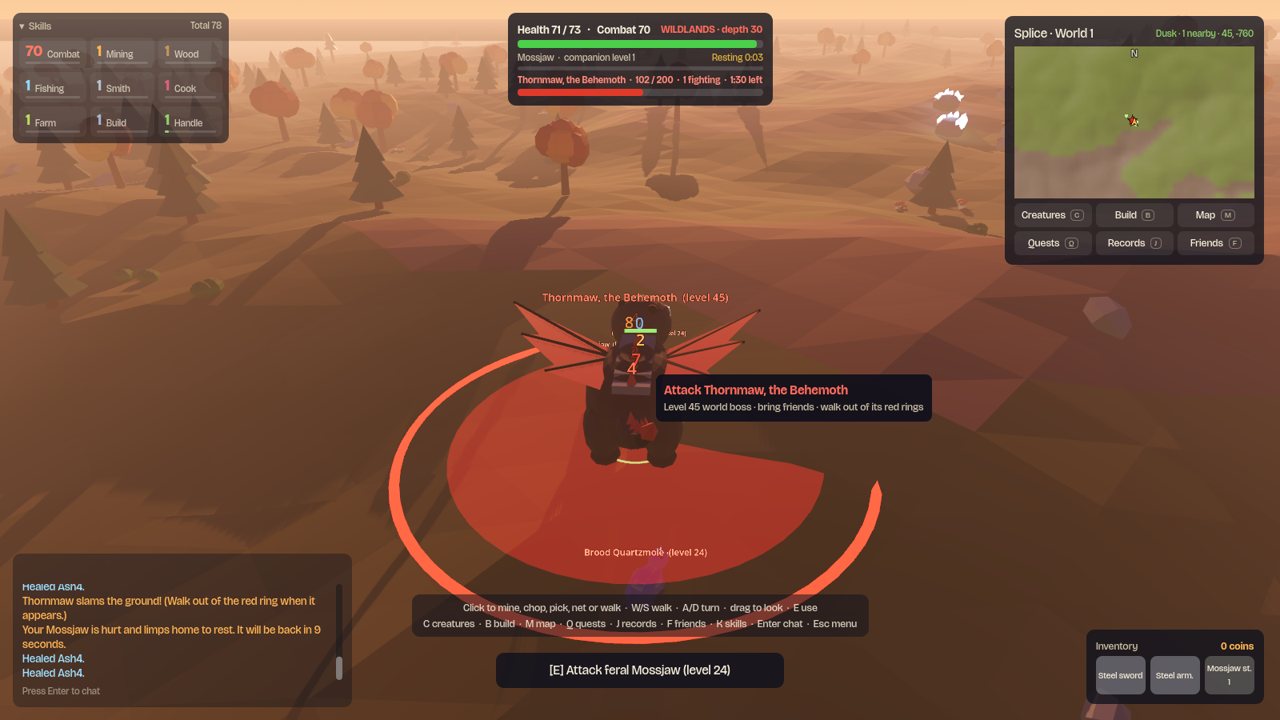
Its slam. Every 13 seconds a red ring appears on the ground around it and fills in. Anyone still inside when it lands loses over a third of their health. Walk out!
Its brood. At two thirds and a third of its health it roars and three level 24 ferals join in.
It picks on different people. It turns on whoever's hurting it every few seconds, so share the healing food.
It's still the Wildlands. Other players can attack you while you fight it, and you can't net it.
When it falls, everyone who hurt it (or whose companion did), and party members close by, gets 2,000 coins, 3,000 Combat XP (and companion XP), one of a starbloom, 2 glimmerleaf, 2 starmetal bars, 3 crystal or 3 heartmelon, and Thornmaw's thorn to decorate your homestead. There's a hiscore board for bosses defeated. Captain Rook's quest The Behemoth finishes when you're one of the fighters when it falls.
Thornmaw about to slam: get out of the red ring. The boss bar is under your health.
Admins
Server admins can start any of these with /event raid, /event meteor, /event sighting or /event boss, and jump to one with /tp name meteor, /tp name sighting or /tp name boss.
17Creatures
Records: collection and hiscores
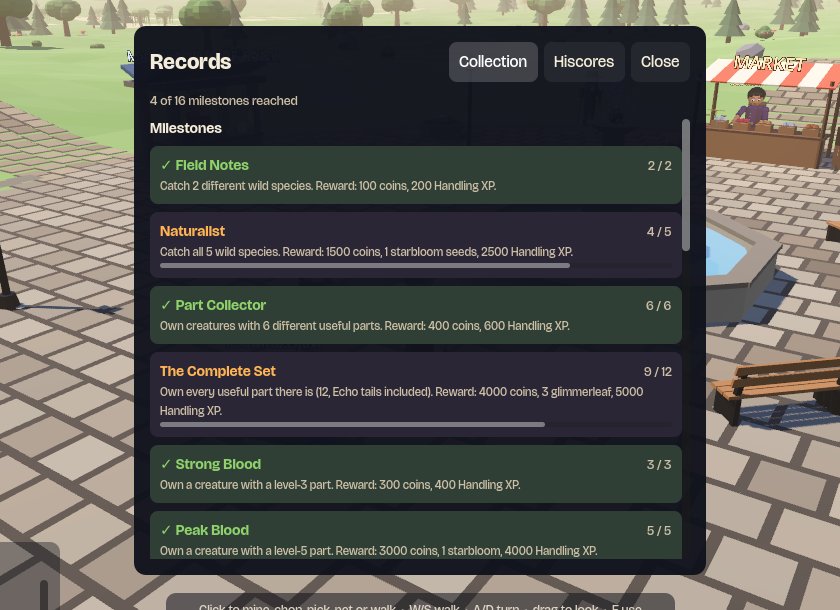
Press J (or the Records button under the minimap) for your collection log, with milestones that pay out, and the hiscores for your world.
The collection log
Everything you own counts: what you catch, hatch, buy or are given. The log keeps the wild species you've caught (all 7; your starter counts), every useful part you've owned at its best trait level (14 in all, Echo tails included), the highest generation you've bred, and every creature name you've owned: 49 in all, since a hatchling takes the first half of one parent's name and the second half of the other's (an Emberwing and a Mossjaw can make an Emberjaw or a Mosswing). Releasing a creature doesn't take anything off the log.
Each wild species in your log also earns you a stone statue of it for your homestead (see Decorations), put straight into your bag.
Reaching a milestone pays out straight away, with a banner, like finishing a quest:
Milestone
What you do
Reward
Field Notes
Catch 2 different wild species
100 coins, 200 Handling XP
Naturalist
Catch 5 different wild species
1,500 coins, 1 starbloom seed, 2,500 Handling XP
Island Naturalist
Catch 6 different wild species (Coralbacks live on Coral Isle)
2,500 coins, 2 pearls, 3,500 Handling XP
Fire and Sea
Catch all 7 wild species (Cinderhorns live on Ember Isle)
4,000 coins, 3 obsidian, 5,000 Handling XP
Part Collector
Own creatures with 6 different useful parts
400 coins, 600 Handling XP
The Complete Set
Own creatures with 12 different useful parts
4,000 coins, 3 glimmerleafs, 5,000 Handling XP
Thirteen Parts
Own creatures with 13 different useful parts
5,000 coins, 3 pearls, 6,000 Handling XP
Every Part
Own every useful part there is (14, Cinder Tails included)
6,000 coins, 4 obsidian, 7,000 Handling XP
Strong Blood
Own a creature with a level-3 part
300 coins, 400 Handling XP
Peak Blood
Own a creature with a level-5 part
3,000 coins, 1 starbloom, 4,000 Handling XP
Third Generation
Breed a generation-3 creature
300 coins, 400 Handling XP
Old Bloodline
Breed a generation-10 creature
3,000 coins, 3 moonpetals, 4,000 Handling XP
Name Giver
Own creatures with 10 different names
500 coins, 800 Handling XP
Many Names
Own creatures with 25 different names
5,000 coins, 2 starblooms, 6,000 Handling XP
Thirty-Six Names
Own creatures with 36 different names
7,000 coins, 3 starblooms, 8,000 Handling XP
Every Name
Own every one of the 49 creature names
9,000 coins, 6 obsidian, 10,000 Handling XP
First Mutant
Hatch a creature with a mutation
300 coins, 1 glimmerleaf
Mutation Breeder
Hatch 10 creatures with mutations
3,000 coins, 3,000 Handling XP
Feral Tamer
Catch a feral creature in the Wildlands
400 coins, 500 Handling XP
Rare Find
Catch a rare creature during a sighting
800 coins, 1,000 Handling XP
Trusted Companion
Raise a companion to companion level 10
1,000 coins, 1,000 Combat XP, 1,000 Handling XP
Inseparable
Raise a companion to companion level 30
5,000 coins, 4,000 Combat XP, 4,000 Handling XP
Settled In
Finish every "Getting started" quest
500 coins, 2 heartmelon, 500 Handling XP
Old Salt
Finish every fishing quest (Fisher Nell)
5,000 coins, 2 pearls, 6,000 Fishing XP
Head Cook
Finish every cooking quest (Cook Bea)
3,000 coins, 4 pineapple tops, 4,000 Cooking XP
Master of Tools
Finish every smithing and woodcutting quest (Tamsin, Bram)
Finish every Wildlands quest (Captain Rook, Scout Wren)
8,000 coins, 4 starmetal bars, 8,000 Combat XP
The collection log: milestones with how far along you are.
Hiscores
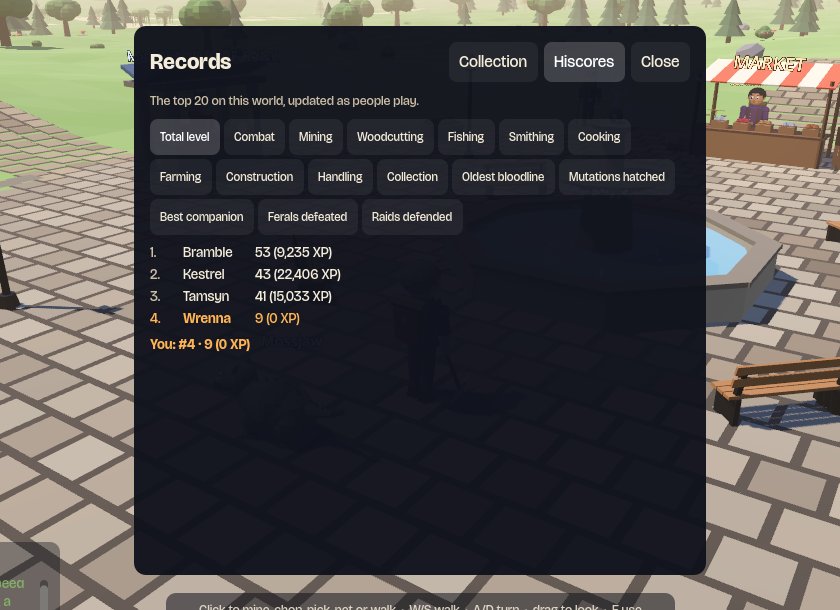
The Hiscores tab ranks everyone on your world, including players who aren't online, on these boards: Total level, Combat, Mining, Woodcutting, Fishing, Smithing, Cooking, Farming, Construction, Handling, Collection, Oldest bloodline, Mutations hatched, Best companion, Ferals defeated, Raids defended, Bosses defeated. Pick one to see the top 20 and where you stand; equal scores share a place. They're on the website too: the hiscores page.
The hiscores: pick a board; you're highlighted.
18The island
Playing together
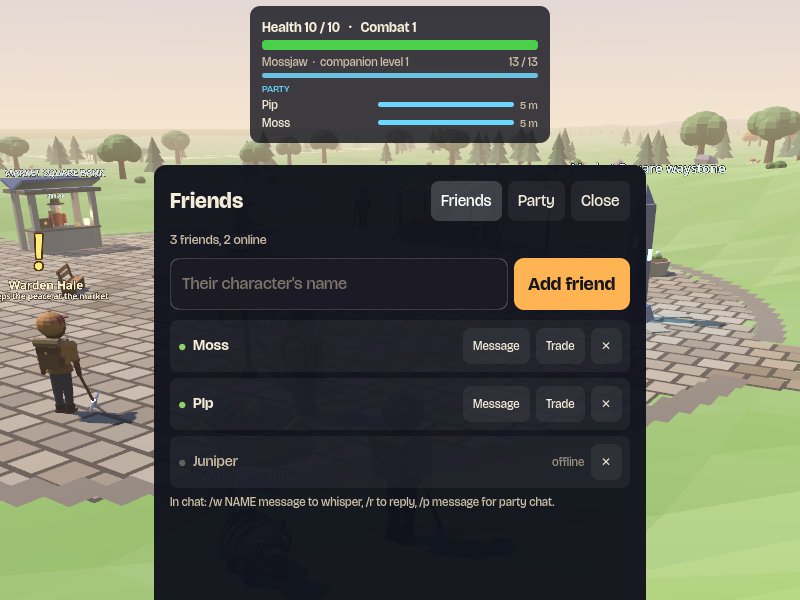
Press F (or the Friends button under the minimap) for your friends list and your party. From there, or from chat, you can message people, team up and trade face to face.
Friends
Type a character's name and press Add friend. Your list shows who's online (a green dot) and tells you when a friend logs in or out. They don't have to add you back. Next to each friend who's online:
Message starts a private message to them in the chat box.
Invite asks them to join your party.
Trade asks them to trade (you need to be standing close together).
✕ takes them off your list.
If they have a homestead, Visit teleports you there (even when they're offline). It's a 5-second cast like home teleport and shares its 3-minute timer, and it doesn't work deeper than depth 20 in the Wildlands. Message works for friends who are offline too: your message waits for them and shows up when they next log in (up to 20 can wait).
You can keep up to 100 friends.
Your friends list: who's online, with buttons to message, invite and trade.
Private messages and chat commands
Type
What it does
/w NAME message
A private message (also /pm, /msg or /tell). It shows in pink, and only the two of you see it.
/r message
Reply to whoever messaged you last
/p message
Party chat, in blue: everyone in your party sees it
/friend NAME / /unfriend NAME
Add or remove a friend
/ignore NAME / /unignore NAME
Stop or start hearing from someone
/invite NAME
Invite someone to your party
/party kick NAME, /leave
Remove someone from your party (if you lead it), or leave it
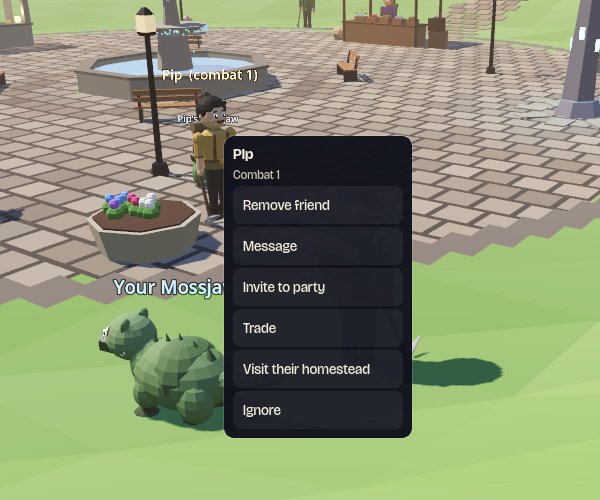
Click another player (or right-click them, which also works in the Wildlands, where a left click attacks) for a small menu: Add friend, Message, Invite to party, Trade (when you're close enough), Visit their homestead (friends), Ignore and Report (see Rules and reporting).
Click a player for everything you can do with them.
Parties
Up to 4 people can be in a party. Invite someone and an invitation pops up at the top of their screen: they press Accept or Decline (it runs out after a minute). The person who invited first leads the party, and only the leader can invite or remove people. If the leader leaves, the next person takes over; when only one person is left, the party ends.
If you lose your connection or log out, your place is kept for 2 minutes: the others see you as reconnecting, and if you log back in by then you're straight back in the party. After that, you've left it.
In a party:
You share Combat XP. When one of you defeats a creature, everyone else in the party within 40 m gets half as much Combat XP again. The one who won the fight still gets all of theirs.
You share raid rewards. If one of you helps drive off a raid on Market Square, party members on the square are rewarded too (as long as they're Combat 10 or more, the level raiders fight).
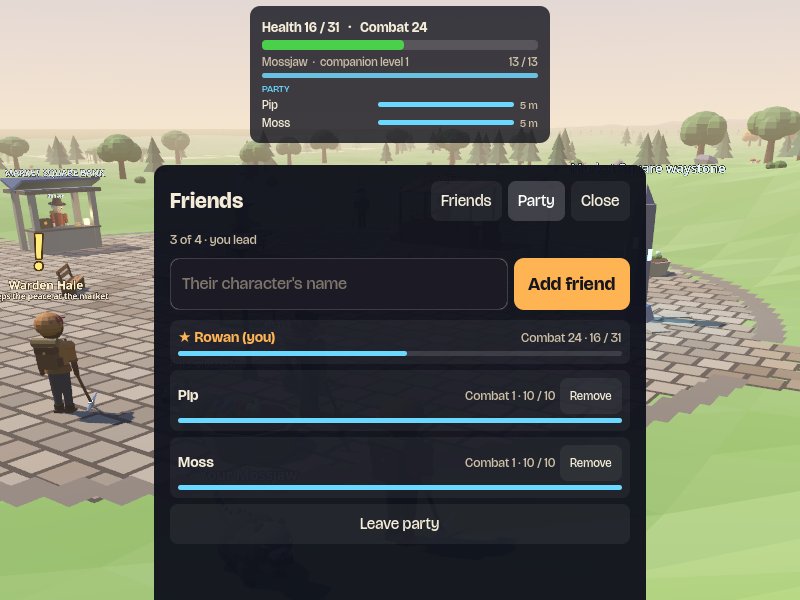
You can see each other. Party members show on the map and minimap in blue wherever they are on the island (on the minimap's edge when they're far away), their names show in blue above their heads, and their health and distance show under your own health bar.
You have your own chat with /p.
A party of three: under your health bar, and in the Party tab.
Trading with another player
The Trade Board (see Trading) is for selling to anyone, any time. To swap with someone you're standing next to, ask them with Trade on the Friends window (or /trade NAME). When they accept, a trade window opens for you both:
Put in what you're offering: coins, anything from your bag (+1, +10 or All), and creatures from your pens (not your companion, and not your last creature). Their offer shows on the right, with each creature's parts.
When you're both happy, press Accept trade. The trade only happens once you've both accepted.
If either offer changes, both Accepts are cleared, and Accept waits a few seconds so you can look the new offer over. Nobody can swap something out at the last moment.
There's no tax on trades between players. The trade is cancelled if either of you walks off (more than 20 m apart), logs out or presses Cancel trade. A creature you trade away that was farming for you stops, and creatures you receive count towards your collection log. You need room in your pens for any creatures coming your way.
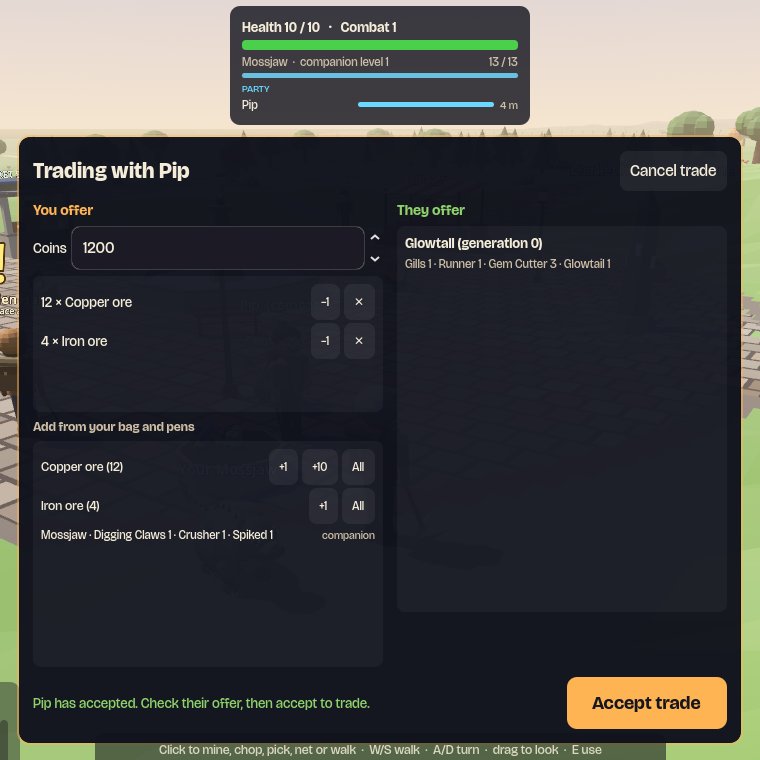
A trade: coins and ore for a Glowtail with a level-3 Gem Cutter. Pip has accepted; now it's your turn.
Ignoring someone
/ignore NAME (it also takes them off your friends list). You won't see their chat, private messages, party invites or trade requests, and to them you look offline. Who you ignore is listed at the bottom of the Friends tab, with a button to stop.
Be careful with trades
Read the other side of the trade window before you accept, especially creatures' parts and levels. A trade can't be undone, and the game team can't give things back after a trade you agreed to.
19Start here
Rules and reporting
Splice is a shared world, so a few rules keep it fun for everyone. If someone breaks them, or something in the game breaks, tell the admins from inside the game.
The rules
Be kind. No harassment, hate speech, slurs or threats, in chat, in private messages or in your character's name.
Play fair. No cheat programs, bots or using bugs to get ahead. If you find a bug, report it (below).
Trade honestly. No scamming: what you offer in a trade should be what it looks like.
Keep chat readable. No spamming, flooding or advertising.
Keep names clean. No offensive names, and no pretending to be an admin.
Admins can warn you, mute you (you can still play, but not chat) or ban you, for a while or for good, depending on how serious it is. A warning pops up on your screen, and you see it when you next log in if you're offline.
Reporting a player
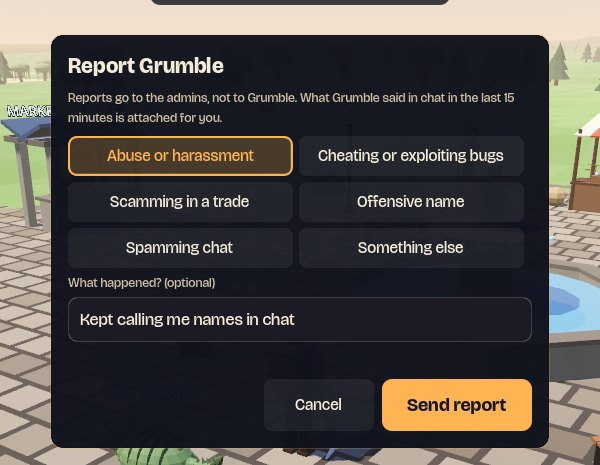
Click the player (right-click in the Wildlands) and choose Report, or type /report NAME in chat. Pick what happened, add a few words if you like, and press Send report. The report goes to the admins, never to the player. Anything they said in public chat, in your party or to you in the last 15 minutes is attached for you, so there's no need to copy it out.
Reporting a player: pick a reason, add a note, send.
You can't report the same person twice in ten minutes (once is enough: the admins see it), and you can send up to six reports an hour. If someone's bothering you, you can also /ignore them straight away (see Playing together).
The chat filter and spam
Slurs and similar words are blanked out (****) in chat and private messages, however they're spelt, and new characters can't use them in their names.
Send more than six messages in ten seconds, or the same message three times in a row, and the game holds them back. Keep doing it and you're muted for two minutes.
Reporting a bug
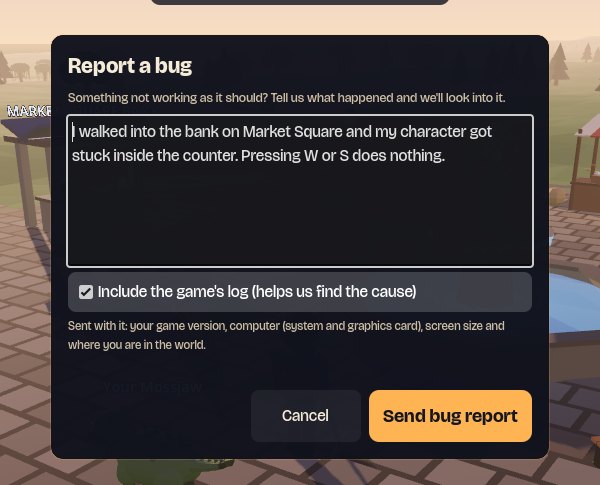
Something not working as it should? Press Esc → Report a bug, or type /bug in chat. Say what you were doing, what you expected and what happened instead. The game adds your version, your computer's system and graphics card, your screen size and where you are in the world, and, if you leave the box ticked, the end of the game's own log, which is often what pins the problem down.
Reporting a bug from the Esc menu.
Can't log in?
Press Report a problem at the bottom of the login screen. It goes to the admins of the world you've picked, with the name you've typed, your game version and your computer's details, and the end of the game's log if you leave it ticked. If you'd like an answer, say how to reach you. You can send three of these an hour.
Please report bugs rather than using them
Found a way to duplicate items or get somewhere you shouldn't? Report it and leave it alone. Using a bug to get ahead counts as cheating.
20Reference
Keeping your account safe
Your account holds everything you've built. A few habits keep it yours.
Passwords
Use a password of at least 8 characters that you don't use anywhere else.
Change it from Esc → Change password. Changing it signs out every other computer that was kept logged in.
Nobody from Splice will ever ask for your password, in game, in chat or by email. Anyone who does is trying to steal your account.
After too many wrong passwords, logins for that account pause for a while. Wait and try again.
Your email address
Add or change your email under Esc → Account and email (it asks for your password). A 6-character code is emailed to you; enter it to confirm the address. Email comes from [email protected]. Whenever your password or email changes, the game emails the (old) address, so you'll know if someone else did it.
Forgot your password?
On the login screen, press Forgot password?
Type your character name and press Email me a code. If the account has a confirmed email, a code arrives within a minute or two (check your spam folder).
Enter the code and a new password. You're logged straight in, and any other saved logins are signed out.
Codes work for 30 minutes and allow 5 wrong tries. You can ask for one code a minute and 6 a day. If your account has no email, contact the game team.
Changing your name
Want a different character name? Ask an admin: they can rename you, keeping everything you have. You log in with the new name and the same password, and your friends, homestead and Trade Board offers follow you.
Deleting your account
Esc → Account and email → Delete my account removes your character for good: creatures, items, coins, skills, homestead and Trade Board offers. Type your character's name and your password to confirm. It can't be undone, and an admin can't bring it back; your name becomes free for someone else. If your email is confirmed, you get an email to say it's done. (Reports other players made about you are kept for the admins.)
The server key warning
The game checks that it's talking to the real server before sending your password. If you ever see a warning that the server's key has changed, stop and check the official announcements before you log in.
21Start here
Tips and questions
Answers to the questions new players ask most, and a few habits that make life on the island easier.
Eight tips
Do Warden Hale's quests first: they're the fastest way to learn the game, and they pay.
Bank before you head north, every time.
Keep a second companion for each job: one for mining, one for chopping, one for fishing or fights.
Water other players' crops as you pass: it costs you nothing and gives Farming XP.
Check the Trade Board's price chart before you sell; the Merchant's price is only the floor.
Attune to every waystone you walk past. You'll want them later.
Build a nest early. Halving egg times adds up fast.
Save glimmerleaf for eggs from your best parents: a mutation there is worth the most.
Questions
I can't mine crystal, chop ironbark or catch glassfish.
They need a companion part as well as a level: a Gem Cutter jaw for crystal, a Crusher jaw for ironbark, Gills for glassfish. Catch or breed a creature with that part and make it your companion.
The rock or tree I want is empty.
Rocks and trees are shared by everyone on the world and refill on a timer. Try another one nearby, or come back in a minute.
My creature won't breed.
You can have 3 eggs at once, and eggs count towards your creature space (20, plus 5 per pen). Wait for an egg to hatch, build a pen or release a creature.
How do I get more creature space?
Build creature pens on your land: each adds 5 spaces, up to 3 pens.
Do things happen while I'm offline?
Yes: eggs incubate, crops grow, your nest keeps burning, food buffs tick down and your Trade Board offers keep trading.
Can someone attack me outside the Wildlands?
No. Other players can only attack you when you're both in the Wildlands, and ferals only live there.
I died. Where are my things?
In a loot pile where you fell, if you were in the Wildlands. Your killer has it for a minute, then anyone; it's gone after 3 minutes. Your 3 most valuable items stayed with you, unless you were skulled.
I'm deep in the Wildlands and home teleport doesn't work.
Home teleport stops working past depth 20. Walk south, or use a waystone you've attuned to: they work at any depth.
Why does my food keep burning?
Burning drops as your Cooking level goes up, and stops altogether at a level set for each recipe (see Cooking). Cook easier food for a while.
The world list says Offline.
The world is restarting or you have no internet. Try again in a minute. If it says a newer version, press Update.
Where do I find other players?
Market Square, especially around the fountain and the market stall. Say hello in chat (Enter).
I found a bug. What do I do?
Press Esc → Report a bug (or type /bug). It sends the details we need to track it down (see Rules and reporting).
Why is part of my message ****?
The chat filter blanks out slurs and similar words. If an ordinary word got caught by mistake, report it as a bug.
AReference
Merchant prices
What Oda the Merchant pays for one of each item: half its value, rounded down. Use it as the floor when you set prices on the Trade Board.
Ore and logs
Item
Merchant pays
Copper ore
3
Tin ore
3
Iron ore
7
Coal
11
Sunstone
27
Starmetal ore
35
Obsidian
60
Crystal
75
Pine logs
2
Oak logs
5
Willow logs
9
Maple logs
16
Palm logs
7
Emberwood logs
30
Ironbark logs
40
Bars
Item
Merchant pays
Bronze bar
9
Iron bar
18
Steel bar
45
Starmetal bar
90
Tools
Item
Merchant pays
Bronze pickaxe
25
Bronze axe
25
Iron pickaxe
55
Iron axe
55
Steel pickaxe
160
Steel axe
160
Crystal pickaxe
450
Crystal axe
450
Obsidian pickaxe
750
Obsidian axe
750
Swords and armour
Item
Merchant pays
Bronze sword
22
Iron sword
45
Steel sword
150
Crystal sword
550
Starmetal sword
900
Obsidian sword
1,300
Bronze armour
40
Iron armour
80
Steel armour
260
Starmetal armour
1,500
Obsidian armour
2,100
Foraged and fish
Item
Merchant pays
Wild berries
1
Mushrooms
1
Raw sandfish
2
Raw silverfin
5
Raw reef snapper
12
Raw stormeel
24
Raw parrotfish
17
Raw firefin
30
Raw glassfish
55
Pearl
75
Cooked food
Item
Merchant pays
Roasted berries
3
Mushroom skewer
5
Forager's stew
13
Roast sunroot
6
Grilled sandfish
4
Grilled silverfin
9
Grilled snapper
19
Smoked stormeel
37
Grilled parrotfish
27
Seared firefin
47
Seared glassfish
85
Seeds
Item
Merchant pays
Sunroot seeds
1
Emberbean seeds
4
Moonpetal seeds
10
Glimmerleaf seeds
22
Heartmelon seeds
20
Pineapple tops
12
Starbloom seeds
75
Crops
Item
Merchant pays
Sunroot
2
Emberbean
7
Moonpetal
20
Glimmerleaf
45
Pineapple
15
Heartmelon
30
Starbloom
160
Decorations
Item
Merchant pays
Fence
8
Flower bed
15
Scarecrow
20
Garden lamp
40
Banner
45
Hedge
45
Picnic table
80
Creature topiary
150
Fountain
450
Tiki torch
30
Hammock
70
Sun lantern
200
Ember brazier
300
Crystal lantern
500
Meteor fragment
200
Raid trophy
150
Thornmaw's thorn
300
Species statues (each)
10
Burnt food is worth nothing. Prices may change after playtests.
Based on the Splice Player Handbook, September 2026 edition (protocol v16 prototype). Numbers come from the game's own data and may be rebalanced after playtests.